
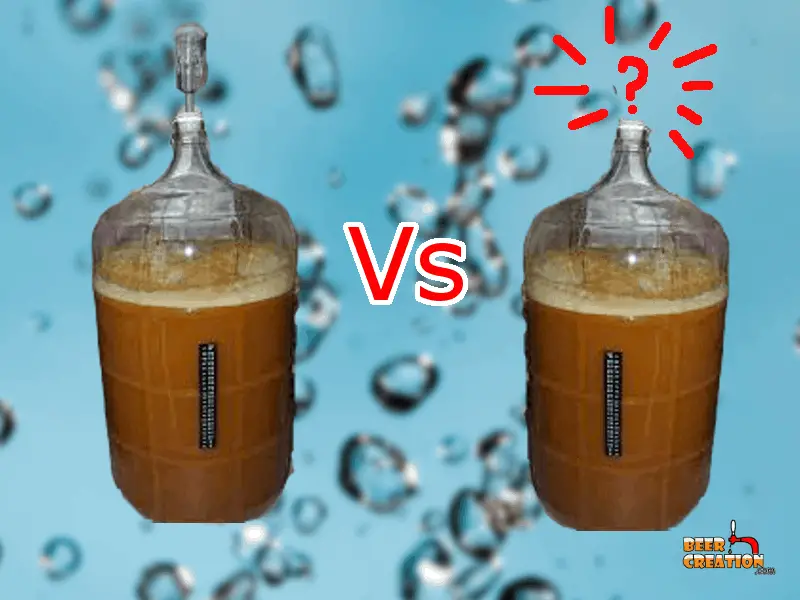
You’ve probably seen a lot of gadgets for purchase while browsing for homebrew equipment and wondered if you actually need an airlock when fermenting your beer. Is an airlock just a gimmick, or is it going to make all the difference during fermentation?
An airlock protects fermenting beer from contamination by ambient bacteria and the risk of oxidation. Simultaneously, it allows carbon dioxide, which is produced during alcohol fermentation, to escape the fermenter. Unreleased Co2 increases the risk of explosion due to built-up pressure.
So that’s the short and sweet answer, but there’s a bit more to it than that! For instance, you may have heard some homebrewers say they don’t consider an airlock necessary. Or you may be wondering whether an airlock is equally important in primary and secondary fermentation. And what type of airlock should you use, anyway?
It’s important to be informed because otherwise you risk ruining a batch of brew or even coating your entire kitchen in beer. Believe me, my wife loves my beer, but NOT on the ceiling!
What is an airlock?
An airlock, sometimes called a fermentation lock, is a small device that a brewer mounts on top of their fermenter. There are different styles of airlocks, but they’re all half-filled with water.
Why do homebrewers use airlocks?
To know why airlocks are recommended, you’ve got to understand a bit about how the beermaking process works. After you pitch wort with yeast—this is beer-speak for adding yeast to unfermented beer—the yeast will begin to feed on the sugars extracted from the malted grains in the wort. As with any process of consumption, there’s going to be a byproduct. In this case, the most important one is carbon dioxide.
Imagine the incredible pressure inside the fermenter if we were to let that Co2 build up in there with no means of escape.
BOOM, right? We’ve got to let the Co2 out somehow, but we’ve got to do it in a way that’ll prevent anything from the air outside the fermenter from getting inside.
If we just left the fermenter open, sure, the carbon dioxide would get out, but bacteria or undesired yeasts in the environment outside the container would get in and contaminate our beer.
Oxidation is another risk of exposure. Beer that has undergone oxidation in the brewing process famously tastes of wet cardboard (can you imagine who first tasted wet cardboard and likened it to oxidized beer?). Other people describe it as tasting like sherry or fruit. Either way, you don’t want it.

New to homebrewing? Please feel free to read my ultimate guide to brewing beer at home and where to start.
Are there any alternatives to an airlock?
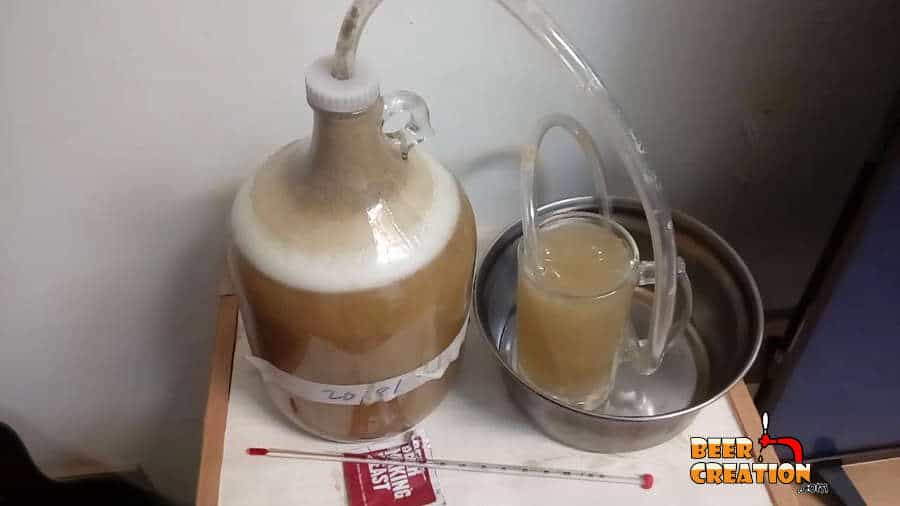
One alternative to an airlock is a blow-off tube (see my article), which is a tube with one end stuck into the fermenter and the other in a container of sanitized water. It does pretty much the same thing as an airlock.
In fact, some homebrewers prefer a blow off tube if they’ve got a greater quantity of wort than they expected, and the container they’re fermenting in isn’t an adequate volume. The issue here is headspace, more on this later.
I’ve also opted for a blow-off tube when the fermentation chamber I’m using isn’t tall enough to have an airlock on top of my fermenter.
Why would you not use an airlock?
Sometimes you’ll get very intense fermentation, as you might if you’re using a particularly aggressive strain of yeast. In this case, foam (krausen) will fill the fermenter and may clog or even come out of the airlock.
If this happens, it’s okay to remove the airlock and replace it when the krausen calms down. The Co2 layer in the fermenter should be enough to protect the beer from possible contaminants as it’s flowing out of the fermenter in a continual stream.
As a side note, a blow-off tube (mentioned above) can also be used if you’re expecting a really intense krausen due to a particularly energetic fermentation process. This is most likely if brewing in fairly high temperatures.
Now, you may have come across homebrewers who say they’ve never used an airlock and have had no negative consequences. They just use, say, a food-grade bucket for their primary fermentation with the lid fitted loosely to let the carbon dioxide out at a healthy trickle. What’s the deal with that?
The truth is, everyone’s got their habits and preferences, and their preferences generally stay the same until something goes wrong. I say if you’re new to homebrewing, why take the risk of not using an airlock? Airlocks effectively do what they’re meant to, and they’re cheap—barely a buck each. Check out the latest deals for S-curve and 3-piece airlocks on Amazon.
When should you put your airlock on?
The airlock should be placed on the fermenter immediately after pitching the wort with yeast. That’s my answer to that. Nice and simple, right?

Special note, though! It’s very important to sanitize the airlock, your fermenter, the lid, and even your hands and arms when you’re working with your homebrew at any stage. You don’t want to introduce any bacteria that would contaminate your batch.
This being said, if you wanted to start with a blow-off tube while fermentation is at its most energetic, then you can simply swap it out for an airlock once things have calmed down. Of course, make sure you keep it all sanitized.
If you want to know more about the best sanitizers for homebrewing and some alternatives, take a look at my article on the topic. Sanitizers are not all created equal, so it’s important to be up to speed on the topic.
Why use an airlock during primary fermentation?
Primary fermentation is the stage where the yeasts are really going to town on the sugars in the wort, gobbling them up and making alcohol and carbon dioxide.
You’re going to see a lot of bubbling at this stage and—as explained above—that gas has to have a way to escape without opening your fermenter up to possible contamination from the air.
Is using an airlock during secondary fermentation really necessary?
When it comes to an airlock during secondary fermentation, you’ll hear some brewers say no and others yes. They’ve both got their reasons. Of course, you’ll get the vast majority telling you to skip secondary fermentation altogether, but that’s a conversation for another article.
The justification for no is that most of the fermenting has already been done during your week or so at the primary fermentation stage, which equates to less Co2 production in the secondary stage.
You can see this in that there probably won’t be any bubbling in your airlock (if you’re using one) now, aside from a stray bubble or two.
On the yes side is the fact that although there’s less Co2 produced, the danger of oxidation is probably higher as there isn’t a constant flow of gas exiting the fermenter. That Co2 in primary fermentation does a fairly nice job of pushing out a lot of stuff that would otherwise make its way into your beer.
You may be able to guess my take on the topic: just use an airlock.

What’s the best type of airlock?
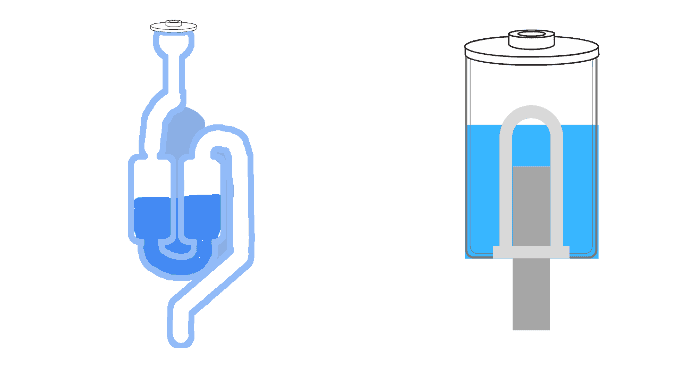
There are two main types: the S-curve and the 3-piece airlock. The S-curve is so-called for its distinctive shape and the 3-piece because, well… you guessed it! There are other terms for them, but this is how I refer to them.
There are advantages to both types, but I prefer the 3-piece purely because you can fill it up a lot and there is less danger of there being no water. There’s a caveat, though:
If the pressure changes inside the fermenter, this can lead to more sanitizer being sucked into your fermenting beer. Is that a problem? No. At the quantities you’ll be using it, Star San won’t hurt you. Check out this article I did on the topic of Star San if you’re not convinced.
How much water should you put in an airlock?
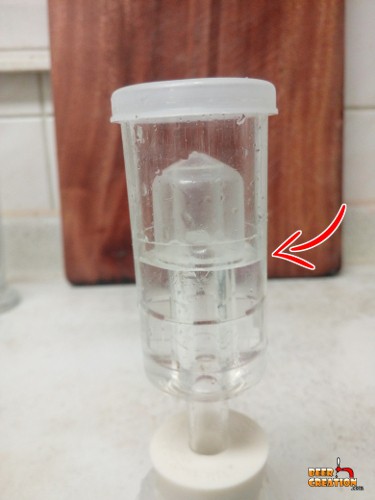
As I explain in detail here, the short answer is to fill up your airlock to 1/3 or halfway up the chamber. That should protect you against contamination.
What if my airlock isn’t bubbling?
If it’s been 48 hours or so and you’re not seeing bubbles in your airlock, your first guess might be that fermentation isn’t taking place, and your efforts are in vain. Not necessarily true.
An incomplete seal on your bucket lid might be the culprit. Fermentation might very well be happening, but with the Co2 escaping through the loose lid, you won’t see any bubbles in your airlock.
I suppose that it’s not the end of the world if you lift your lid and take a very quick peek inside, assuming you are brewing in a bucket. If there’s krausen, fermentation is taking place. If you are brewing in a clear carboy, then you can probably see some activity on the surface of the beer already.
However, in almost all cases I really would say don’t take the risk of exposing your beer to the air, just be patient and give it the recommended fermentation time as per your recipe.
I don’t have an airlock, what do I do?
If you don’t have an airlock, there are a few DIY options available to you. To make your own, you’ll need:
- one standard-sized pill bottle
- a glass tube, e.g. from a solder
- a tube smaller than the diameters of both pill bottle and glass tube, e.g. from a pen
- two drill bits
- drill
- hot glue or epoxy
Drill a hole equal to the pen’s diameter in the bottom center of the pill bottle. Stick the pen into the bottom of the pill bottle and glue in place both inside and out to ensure a watertight seal.
Next, glue the glass tube into the cap of the pill bottle and secure it with glue. Place the pill bottle/secured pen into the glass tube/pill bottle cap.
Don’t forget to drill a small hole off-center in the pill bottle cap to allow Co2 to escape.
Finally, fill the airlock with water about halfway between the top of the pen and the bottom of the pill bottle.