
Whether it’s your first ever attempt at brewing beer or you are a veteran brewer, there’s always a piece of kit you forget on brew day. Below is a list of key equipment beyond the essential kit such as a brew kettle and fermenter. These are the little things that make life easier when actually brewing beer and can stop you wasting precious wort before you get it into your fermenting vessel.
If you want to hear more about all my suggestions for the essential kit you need for brewing, then take a look at my recommended gear page.
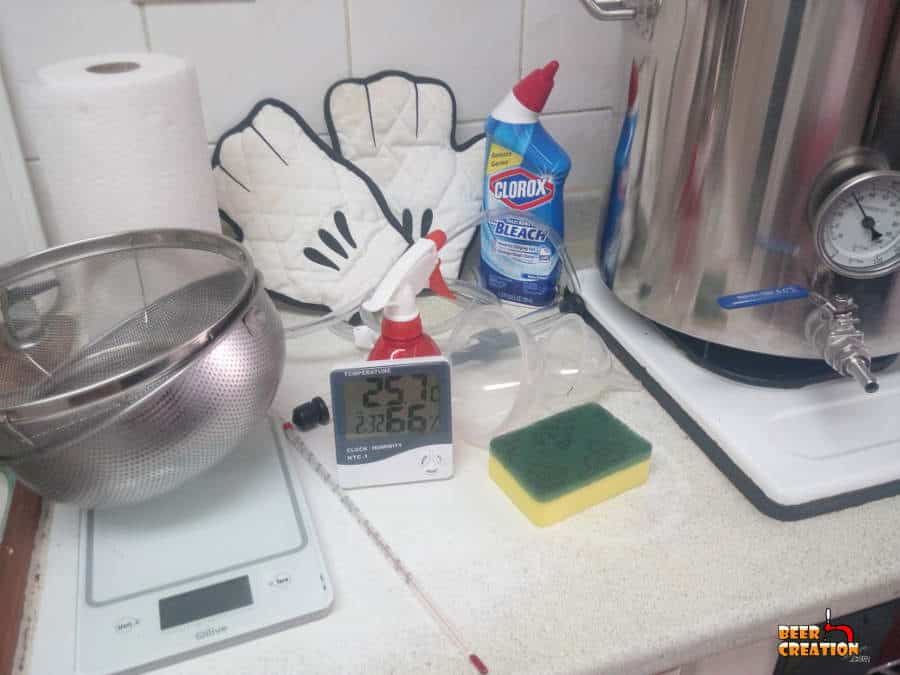
A Strainer, sieve or colander
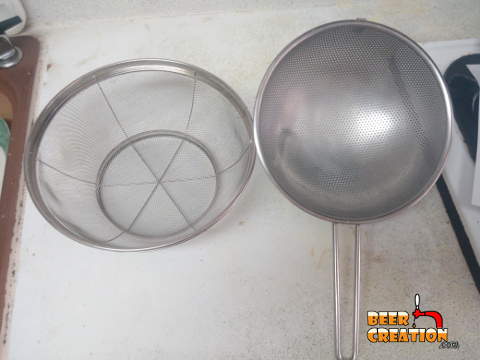
This is an item that most people have knocking around their kitchen at home, but not if you aren’t a keen home chef. It’s also something which you’d never find in your average home brewing starter kit. Nevertheless, it’s really useful to use a strainer, sieve or colander to help filter out your wort as you transfer it from vessel to vessel.
Getting a strainer with a fine mesh will help you limit the amount of organic material, such as hops or even grain particles, from entering your fermenter (shop for your hops online at homebrewing.org). This is important because compounds like these can lead to astringency in your final beer
A long-handled spoon
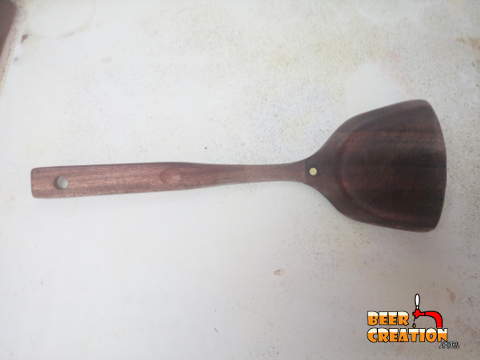
Ideally, this should be a stainless steel spoon but if you have a long wooden one then that can work too. The longer the better as an average yield from a brewing kit or recipe is 5-gallons, so that’s a big pot you’ll be working with!
You need a spoon not just for mixing your Dry Malt Extract (DME) or Liquid Malt Extract (LME) with your added water when using an extract-based kit, but also for getting an even consistency when brewing from an all-grain recipe.
Another way that we use a spoon on brew day is to agitate the wort in order to aerate it before pitching it with yeast in the fermenter. Yeast cells need oxygen in order to function properly, so being able to stir your wort is essential to the success of your beer.

A pair of oven mitts
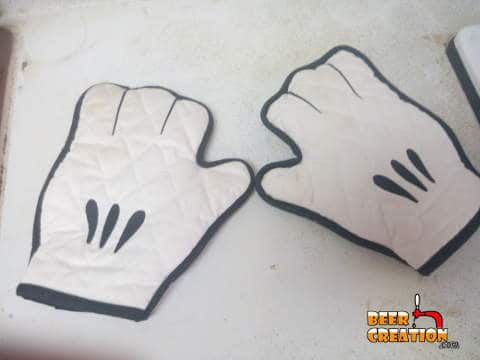
An incredible amount of accidents in the home occur in the kitchen while cooking, and brewing is no exception. You will be dealing with very hot and sticky liquid which if it spills on you will scold you like an angry teacher.
Not only is the actual wort itself hot, but all the equipment you put in it. So having a good pair of insulated protective gloves is essential to ensuring you can safely finish your brew day without a trip to the emergency room. Keep yourself safe and don’t try to rush yourself when working with such hot liquid.
A pair of shoes

For the same reason that I mention wearing protective gloves when working with hot wort, think about protecting the rest of your body too. The major injury most people suffer from when they’ve been scolded by hot water is to their feet. Make sure that you always brew in shoes that cover your entire feet and don’t ever do it barefoot. It may make a funny YouTube video but it won’t have you laughing when it happens.

In the same breath, if you aren’t brewing in intense heat, always wear long sleeves and cover your torso too as hot wort can bubble and even spit if your heat source is too powerful.
A Thermometer
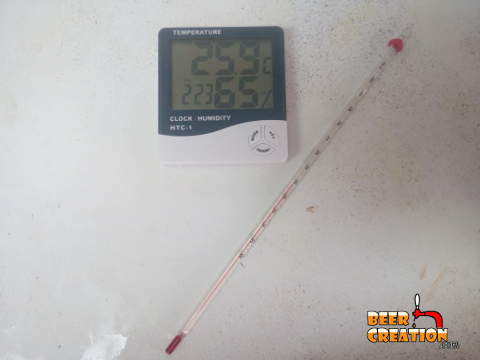
If you’ve picked up a recipe kit without being given any equipment, then you will certainly need a thermometer. It’s an essential piece of kit for brewing.
If you are mashing your grains, then you need it to help keep the temperature constant. A long glass ‘instant read’ thermometer will allow you to check the temperature of different areas of mash if mashing in a conventional pot. Getting an even temperature will really improve your ability to extract as much fermentable sugar as possible.
A thermometer is also essential for the post-boil phase when you need to wait for the wort to cool down to below 72°F (22°C) so that you can pitch your yeast without killing it.
Additionally, a thermometer that gives you room temperature can be useful for when you are fermenting your beer and also for more advanced brewing when you have to calculate things such as evaporation loss during the boil.
A Stopwatch
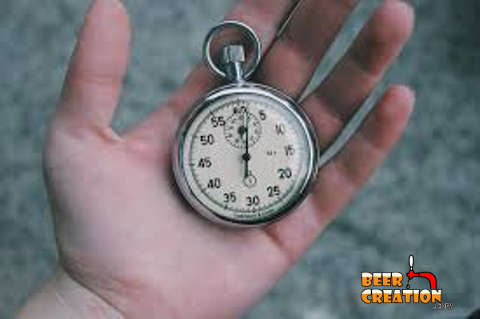
Although probably everyone now has this on their phone, a stopwatch is much easier to use on brew day than a normal clock. You need to be as accurate as you can with timings especially when it comes to adding your hops during the boiling phase.
So, make sure that you have a real stopwatch to hand or that your phone is plugged in and fully charged during the entire course of your brew day. It sounds like an obvious point, but you’d be surprised how many brewers start their brew day without this essential piece of kit!
A Measuring cup
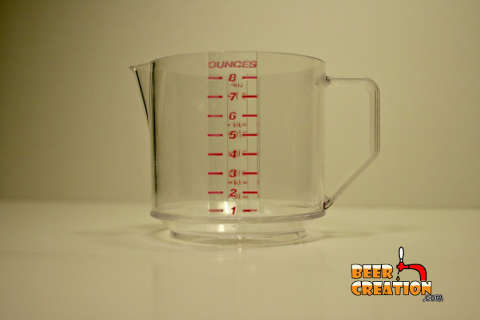
Like with any recipe, getting the correct proportions of different ingredients is vital if you want to get the best possible results. Most brewing starter kits give you exactly the right amounts of malts (crushed or as DME/LME) and hops. However, you have to figure out how much water you need for yourself.
For most of us, we are dealing in gallons of water rather than with cups of water, so you may need to improvise a little. Your average large bottle of water is about 50.7 fl oz (1.5 l), so 5 gallons is just over twelve and a half 50.7 fl oz water bottles.
A set of electronic scales
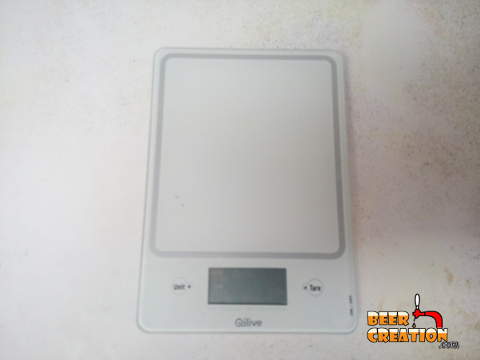
An alternative way to measuring the volume of the water you’ll need for your brew day is to measure its mass. If you have a decent analog or digital set of scales you can measure the weight of your pot and add enough water into it for your needs.

5 gallons of water is roughly 8.35 lbs, so 5 gallons has a mass of 41.75 pounds (18.93 kg). You don’t need to start with the full complement of water to reach your target yield (5 gallons in most cases) for many brewing recipes, but if you have a secondary container to measure large quantities of water in, using a scale is a very accurate method to use.
A Pot with a spigot
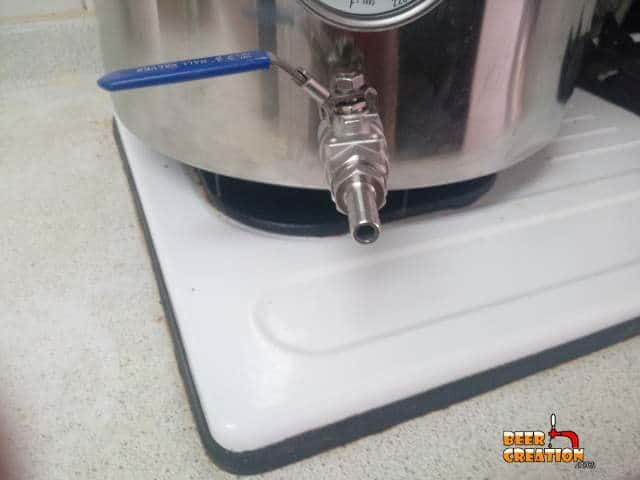
Ok, I said that I wouldn’t mention the commonly thought of equipment such as your brew kettle, but I just want to make this point. If you can get yourself a pot with a spigot (tap or faucet) it’s going to make your life a heck of a lot easier when you have to transfer your boiled wort from the kettle to your fermenting vessel.
Don’t get me wrong, there are other ways to successfully transfer the wort using a different piece of kit, but if you can avoid having to pour it out by hand I really advise that you do it. A spigot is a godsend for any brewer on their first (and subsequent) brew day.
A funnel
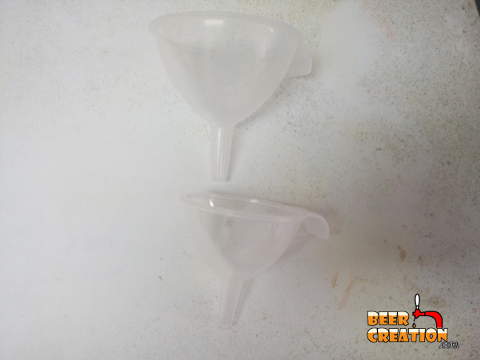
If you can’t get hold of a pot with a spigot, then a funnel is a really easy way to transfer wort from the boil kettle into a carboy fermenter by hand.
Make sure that you opt for a funnel with a wide rim so that you can minimize spillage (and you will spill some if pouring by hand). It’s also a good idea to use a coffee filter in the funnel just to avoid adding any unwanted compounds into your fermenter.
You can also use a funnel if you have a bucket fermenter form a kit. Just check that your funnel will fit into the airlock hole on the lid. If your funnel of choice is too thick, then you could get a smaller funnel and place your bigger funnel into that one. You may need some brave soul to hold the makeshift system in place for you. Darling!?
An Auto-siphon
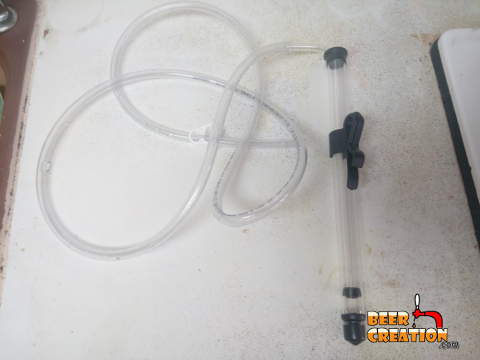
Again, a spigot with plastic tubing is the easiest option but another avenue to explore is using an auto-siphon. It’s a really great piece of kit for racking beer, both into secondary vessels and also bottles and even kegs.
It works by causing a vacuum in the siphon which then sucks your wort out of your pot without the need for you to do anything else. It’s a more high-tech solution than pouring the wort out by hand and it’s going to save you a lot of arm shaking. Well worth the expense I’d say!
A Spray bottle (water)
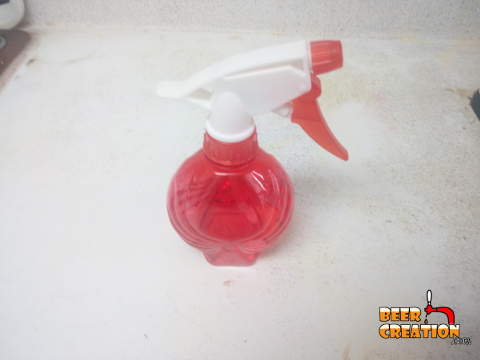
This is a useful tip which uses science in a very practical way. If you fill a bottle with a spray nozzle with cold water (the same as you’ve been using as your brewing water) you can use it to combat potential over-boils in the boiling process.
As soon as the wort starts bubbling up to the rim of your brew kettle, give a generous squirt of the cold water and it will push the foam back down. This is really great if you are working with a pot with a limited volume capacity and you don’t have a lot of space to play with. However, this isn’t the ideal equipment to be working with. I’ve written an in-depth article all about choosing the right size pot, check it out here if you want to know more.

Some Dry Yeast
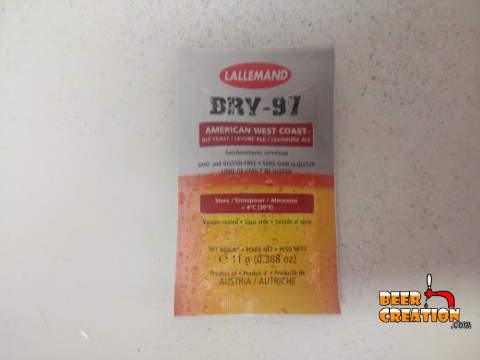
Even if this is going to be your first ever brewing experience, get used to the idea that this is going to be a permanent hobby. Why fight facts? So, at some point in a homebrewers career, they are going to have an issue with the yeast they wanted to use. So, getting a backup, even for the first time, is really a smart course of action.
Dry yeast can last for a long time if you store it correctly (see my article on the topic here) so, always have a couple of packets knocking around in case things don’t start well in the fermenter. All you need to do is to rehydrate the dry yeast and pitch it to get the fermentation process off to a bubbly start.
Some household bleach

It sounds counterintuitive, but normal bleach is actually a perfectly fine sanitizer for brewing equipment. Use about 1 tablespoon per gallon of water (4 ml per liter) and fully submerge your equipment for about 20 minutes before thoroughly rinsing it and allowing it to air dry.
Most kits do come with a sanitizer pack included, but if you run out or need to resanitize something, then it’s good to have some household bleach around to save the day!
A clean sponge
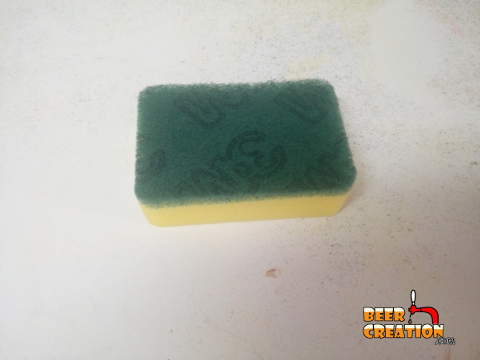
If brewing has one major lifestyle change it’s making you more conscious of cleanliness than you have ever been in your life. Making sure that your brewing equipment is both cleaned and sanitized, as well as your brewing area, is key to avoiding a whole host of nastiness later.
Allowing bacteria to enter your wort in the early stages, and especially after chilling it before pitching, can lead to off-flavors and a nasty infection in the fermenter.
So, make sure you have a couple of clean brand-new sponges to wipe down your brewery surfaces (probably your kitchen) and to clean all your equipment. Don’t reuse what you have in your sink already!
Some Paper towels
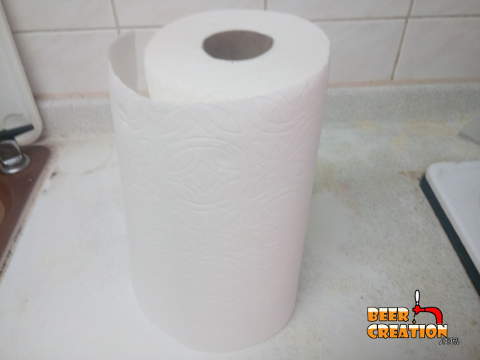
Again, it’s perhaps being an OCD brewer, but when I am drying my equipment after having cleaned and sanitized it, I don’t like to place it directly on the kitchen countertop (even though I’ve just sanitized that too!). Instead, I use paper towels which also help soak up any excess water from rinsing.
I know that it’s probably not very ecological, so you could use a regular tea towel instead, but I’m still stuck ruining our planet with paper ones.
A mop & bucket
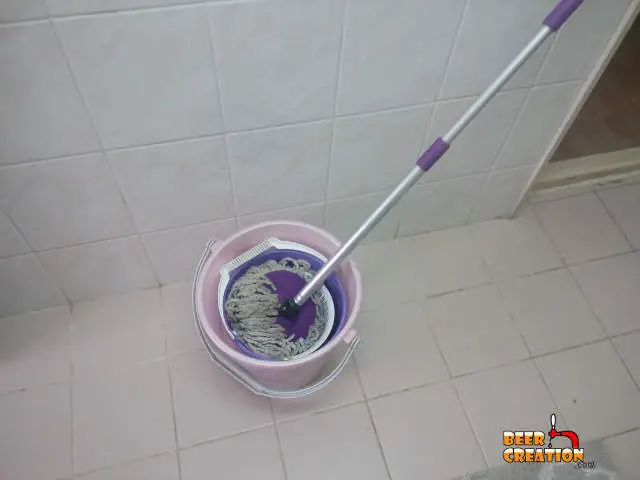
You are going to spill wort on your floor during your first couple of brewing attempts, it’s going to happen. What’s more, the wort is extremely sticky (well that’s the point, sugar, right?) and it’s a pain in the neck to clean.
So, have a mop and bucket on hand so that you can clean it up before it starts to dry and your feet start sticking to the floor. As always, clean as you go to keep all your brewing surfaces (even the floor) spotless and reduce the risk of bacteria getting into your beer.
A stovetop or burner
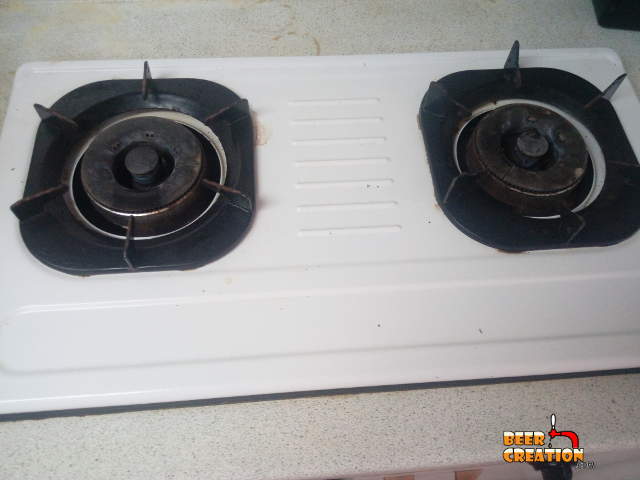
For most of us, we start out boiling our wort up in the kitchen on a conventional stove. However, not all stovetops were made equal and they aren’t always up to the task of heating 5 odd gallons of water.
So, whenever possible, do a trial run with regular water and test out your stove’s power. If you can’t get a good rolling boil with water, then you probably need to invest in a burner of some sort.
When using a propane burner for brew day, always make sure that you have a full back up propane tank on hand. Things can go wrong and you don’t want to be halfway through your boil only to find you have no more heat. Always be prepared!
A snack

Depending on whether you are brewing to an extract-based, all-grain or BIAB recipe your brew day could take anywhere between a couple of hours to almost the entire day. Most of that time you need to be on hand to supervise your beer as it either mashes, boils or when you are racking it.
Regular meals may be hard to squeeze in, so make sure that you have some snacks on hand to keep your blood sugar up and your mind sharp! Of course, one or two little beer helpers can also be good, but don’t tie one on while there is work to do!
Final tips for getting the most out of your brewing equipment
Cleaning and sanitizing
It’s essential to ensure that any piece of equipment which comes into contact with your wort, or any other piece of equipment is thoroughly cleaned and sanitized before use.
This means cleaning it first to remove any organic matter which may have become stuck to it as well as soaking it in a sanitizing solution. I’ve mentioned bleach above as a last-minute option, but it’s by far better to use no-rinse sanitizers (Star San for example) as they require a lot less contact time with the equipment to sanitize it.
Always keep a container of sanitizer on hand throughout the initial stages of brewing so that you can quickly resanitize any equipment which you inadvertently contaminate by dropping, placing on the countertop or letting the dog lick (it happens!)
Organization
In order to have a smooth brew day, make sure that you read your recipe or instructions carefully several times. This is especially true if this is your first time brewing, but also if you’ve done it a few times. Have each stage clear in your mind before you start it.

Also, have your equipment laid out in the order that you will need it. Of course, this is easier said than done when brewing in a confined space, which in my case at present. However, it’s important because you don’t want to be looking for something when you have to be conscious of your brewing timings. Have it organize well in advance and you won’t have any added stress on your brew day.
Happy brewing!