
The thing a love about homebrewers as a group, apart from how friendly they are, is their ingenuity! When it comes to a crisis, as homebrewers we can generally find a solution which works.
So, this brings me to the question today, if you needed to would a bottling bucket make a successful fermenter?
A bottling bucket will make a perfect fermenting vessel for any stage of fermentation, even if it’s just an interim container. Ideally, it should be totally airtight, have the capacity to hold an airlock as well as the capacity to give the fermenting beer enough headspace to avoid spillage.
This being said, I think that there is a little more to the story and so I just want to share my thoughts with you on when and if indeed you should ever use a bottling bucket as a fermenter.
Would a bottling bucket really work as a fermenter?
Well, I think if we are talking about the standard plastic bucket that most of us inherited from that uncle who used to brew beer or from our very first starter kit, in most cases, yes it would.
Assuming that it’s clean, food-grade plastic(which it should be if you’re bottling from it) and has a lid that fits with a drilled hole for an airlock or blow-off tube, you are pretty much ready to go.
The only other thing really to take into consideration is whether or not the bucket has enough headspace for the beer you are fermenting; check out my other article on ensuring enough headspace in your fermenter.
When to use a bottling bucket as a fermenter?
If we imagine the average starter kit, something like the Northern Brewer starter kit which is pretty good if you are just starting out (see Amazon for details), you’ll often get two almost identical buckets. One is intended for fermentation the other for bottling.
So, in functional terms, there is no difference between your average fermenting bucket and bottling bucket. In the example kit, the only real difference is that you only get a single lid.
As to In which situation I would use a bottling bucket as my fermenter, I think there are three main scenarios.

A) I happened to break my regular fermenting bucket or carboy somehow and need a last-second backup. If I had the lid to make it airtight, then I would hesitate to use it in this situation.
B) I only ever had one main fermenter but wanted to use the secondary fermentation technique to improve my beer’s clarity. Again, if I was working with the Northern Brewer starter kit, I could still do this only with one lid to hand.
C) I have a carboy and a bottling bucket and I want to go through secondary fermentation but I know that my bottling bucket isn’t 100% airtight. If this was the case, I’d have to use the two fermenting vessels in the right order.
Using bottling buckets in primary fermentation
In my experience, using bottling buckets for every batch isn’t an issue at all. Like I said before, they are pretty much the same thing as your average fermenting bucket. However, when it comes to using a carboy and a bottling bucket, the latter may have a spigot which is quite useful in certain situations.
If you have the choice between having to use a bottling bucket or a carboy for primary fermentation, I would definitely use the bottling bucket first. Even if it’s not as airtight as your carboy might be, the lag phase of fermentation is relatively short under the right conditions and the growth stage is so vigorous that oxidation shouldn’t be a huge issue.
Your beer is much more vulnerable, in my experience, when fermentation is slowing and at about the time that you should have switched from the primary to the secondary fermenter. (For more information on this, check out my article on when to do this).
New to homebrewing? Please feel free to read my ultimate guide to brewing beer at home and where to start.
By using the bottling bucket first, then racking your beer into your carboy for the secondary fermentation or when you want to dry hop a beer, you’ll find that you can take advantage of the bottling bucket’s spigot.
Generally, with trub, the loss will be higher during the most energetic stage of fermentation. That is to say that when the yeast starts to gorge itself and meet its capacity it will flocculate and drop out of suspension.
This is far easier to clean out of a bucket that has a very wide opening to get your arms into rather than a carboy. Seeing that you should experience less flocculation and less trub in secondary fermentation, this is just a no-brainer when it comes to choosing between the bottling bucket for primary fermentation.

This of course means that you can then rack your beer into your bottling bucket from the carboy after you’ve checked that fermentation has fully completed and your beer has cleared up nicely.
Using bottling buckets in secondary fermentation
Even though I think that it makes more sense to use a bottling bucket as your primary fermenter when you have a carboy as your second vessel, there’s nothing stopping you from using it in secondary.
If in case A) you are using it as a spare, well you don’t really have a choice and you need to adapt to the situation to save that batch of beer. If we are talking about case B), your fermenting bucket and your bottling bucket are pretty much the same things, the only difference is which one is wearing the lid.
But on a more serious note, the only issue I can really see when using a bottling bucket (with a good seal) as a secondary fermenter, is when it comes to bottling your beer.
If you plan on bottling straight from the secondary fermenter, your bottling bucket in this situation, you may still have a fair bit of organic material sitting in the bottom of it. You don’t want this to make its way into your bottled beer if you can help it.
This to avoid when using a bottling bucket
Not using a lid
As we said before, some of the kits on the market will only give you one lid even though they give you two buckets. This is because, so I think, the manufacturers think secondary fermentation is too advanced for beginners to worry about. There is also a general move in recent years only to carry out primary fermentation.
Anyway, just make sure that you never ferment beer that is exposed to the open air without even the pretense of a protective cover.
Having a bad seal
Again, this is really a concern for the early and later stages of fermentation when substantial amounts of carbon dioxide aren’t trying to force their way out of your fermenter.
If you have a bad seal on your fermenter it could lead to air getting in which will, in turn, lead to oxidation, that lovely band-aid, or old cardboard taste.
A good indication of a bad seal, but not exclusively, is when your airlock doesn’t bubble much during the most aggressive stage of fermentation. Of course, there are other reasons for this.

To test if you have a bad seal you can try the following two methods:
Method one (bucket with a spigot)
Put the lid on and take a sponge with soapy bubbles on it, wipe the soapy bubbles all around the lid. Take a bicycle pump (or electric pump if you have one) and pump air in through the open spigot. If you can find something to pack around the outlet of your pump, that’ll be even more effective.
As the bucket fills up with more air, it should either pop the lid off if there the seal isn’t loose or start flowing out of the gaps. The soapy bubbles should show you if there is a leak or not and where it is.
Method two (bucket without a spigot)
If your bottling bucket doesn’t have a spigot, then you will have to make some gas inside the bucket while the lid is on. Cue David Copperfield.
In fact, you can do this quite easily just by adding baking soda (sodium bicarbonate) to household vinegar. Use a 12 to one ratio of vinegar to baking soda, adding the latter to the former for best results.
To fill a large vessel like a bottling bucket, you may not actually need as much vinegar and baking soda as you might think, seeing as gas expands. As this experiment produces carbon dioxide, just make sure you do it in a well-ventilated place.
Not using an airlock
You need to use an airlock in every stage of fermentation whether it’s primary or secondary. Your beer is at its most vulnerable when at the perfect pitching temperature and throughout the fermentation process. An airlock is your best defense against getting a bacterial infection in your beer or experiencing oxidation.
If you want to know more about airlocks, how much to fill them up, and alternatives to them, check out my post here.
Transferring beer too much
Although I mentioned using a bottling bucket as both a primary fermenter and then again as a bottling bucket, to limit the amount of organic matter in the final beer, this is also risky.
The reason why many homebrewers are against using secondary fermentation is actually that the benefit, not having your beer in contact with ‘dead’ material, is often less risky than experiencing oxidation when you rack it from primary to secondary and then to a bottling bucket.
Whenever you move your beer around, even just by moving the fermenter, you are likely to add oxygen into it when splashing or expose it to the air when transferring from two open containers. You want to limit this as much as you can throughout the brewing process. Still, it’s hard to completely eliminate the risk of oxidation as a homebrewer.
Opening it up too much
The top advantage of carboys over fermenting buckets/ bottling buckets, as I covered in my article here, is that they are transparent. This is especially true for primary fermentation.
I don’t know about you, but I really enjoy watching my beer get lovely and bubbly and there is nothing more exhilarating (don’t tell my wife) than seeing krausen climb the inside of your fermenter.
If you are staring blankly at these words thinking “what is Phil talking about”, it’s probably because you are brewing with fermenting buckets and you’ve resisted the temptation to lift the lid and take a peek. If you are fermenting in your bottling bucket and peeking, then you are really risking a whole heap of problems in your beer.
Adding priming sugar to a secondary fermenter
If you are planning on using your bottling bucket as a secondary fermenter and then racking directly from it into your bottles, then don’t dump your sugar into the bucket.
I’ve found that one of the most effective ways of getting uniform carbonation in my bottles when using priming sugar, is to gently stir the beer. If you were to do this with the majority of the yeast which as already flocculated in your bottling bucket, it might just defeat the entire point of secondary fermentation.
Now, if you have no choice and this is the way you have to do things, then get on over to your local homebrew shop (if you live in the 5 biggest US cities, you can find some suggestions here) or onto Amazon and buy some carbonation drops.
Using a 5-gallon bucket for a 5-gallon batch
Now, I have to be honest I don’t know if they generally make a 5-gallon bottling bucket, but they certainly don’t intend you to use it on a 5-gallon batch. In the same breath, don’t use a 5-gallon bucket to ferment your average brew, especially for primary fermentation. You need at least 20% extra headspace for a fermenting beer otherwise you’ll have a major spillage on your hands.

So, as long as you keep all this in mind, you shouldn’t worry about using a bottling bucket as a fermenter in primary or secondary fermentation.
If you don’t already have a bottling bucket, I can recommend the following:
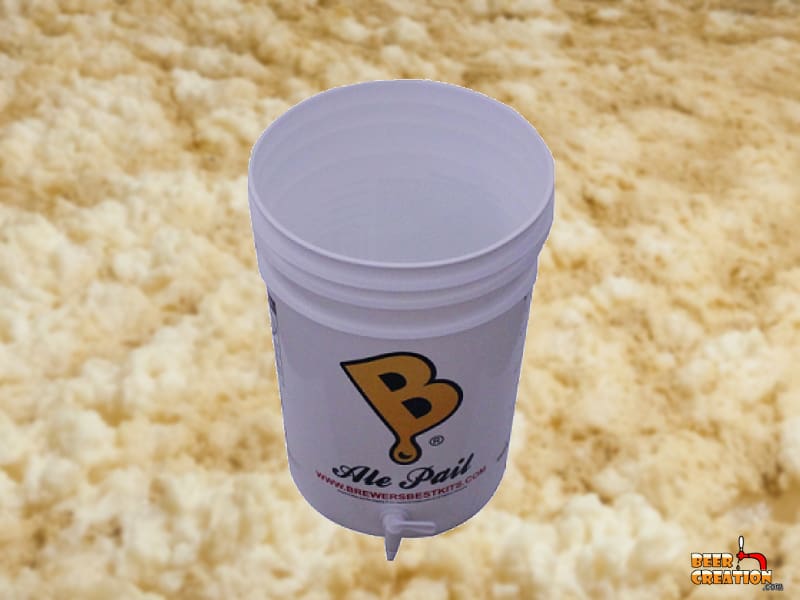
Brewer’s Best 6.5 Gallon plastic fermenter

This fermenting bucket is pretty popular and can double up as a bottling bucket if you really needed it. I’d go for this over the actually bottling bucket they sell just because it comes with a lid. Check out the latest deals and prices on Amazon.