
Brewing your own beer can become a huge financial investment over time, but it never has to start that way.
Although there are many fancy gadgets on the homebrewing market these days, if you focus on controlling the process rather than time-saving devices, you can still make very good beer for a lower upfront cost.
It’s possible to brew very good beer using a $150-250 starter beer kit. For better fermentation temperature control, you’ll need a $30 temp-control unit for an existing fridge/freezer. Add another $300-400 to buy a new one. This brings the total to about $180-$680 depending on what you already own.
Of course, there is much more to the story than just those numbers. If you happen to have a lot of the right pieces of kit already at home, it could be much cheaper.
So, what I’m going to do is to go into this topic in a lot more detail and give you all the options.
We’ll talk about what different ranges of budget can get you and how the quality of the beer may be improved. So, please read on for more information!
Getting started
In reality, you don’t need a whole heap of equipment to brew alcohol, much less so beer. We’ve been brewing beer as a species for at least 5 thousand years, and there were no all-in-one brewing systems in the Pharaoh’s linen closet.
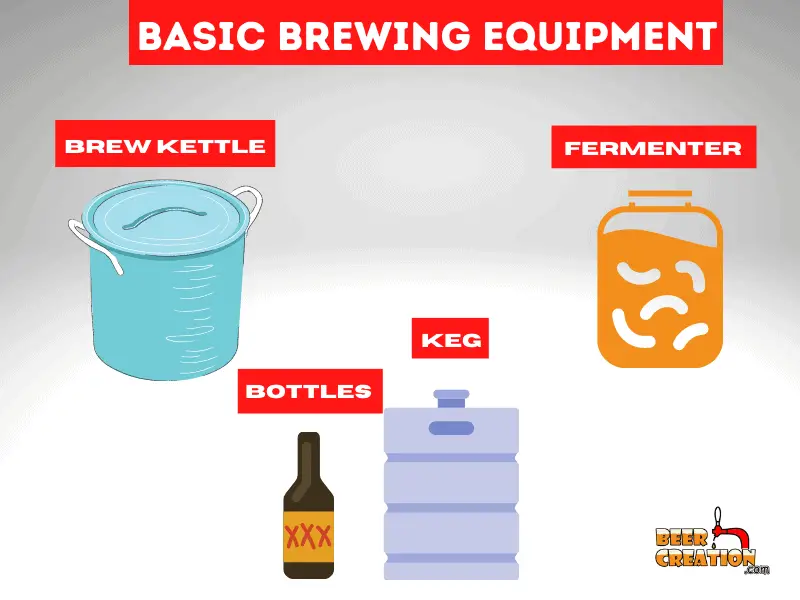
In terms of equipment, you only really need three basic pieces of kit:
- a vessel to heat (and boil) the wort (unfermented beer).
- a vessel to ferment the beer in.
- a vessel or vessels to store the fermented beer in.
If you have a large stockpot capable of holding 2-5 gallons (7.5 -19 liters), that will work. If you have a large food-grade bucket, something like a feed bucket, with an airtight lid, you are in business. If you have some large clean swing-top bottles, that’s just perfect.
In essence, brewing a beer with basic equipment is possible for most people right now without having to buy anything more than a $20 ingredient kit from Amazon.

However, this article is about how much it costs to brew “great” beer, and to do that we need to really concentrate on three main things: Temperature control and preventing oxidation, and good sanitation.
Temperature Control
You may have heard people say that you can’t make decent beer from a beer kit because of the kit itself. However, much of the reason for homebrewed beer tasting like, well, homebrewed beer isn’t the kit’s fault. It’s the brewers.
The biggest issue and I was guilty of this for a long time, is not controlling the process of brewing enough, especially during fermentation and storage.
As yeast, the essential ingredient in beer is a living breathing organism, we need to treat it right. When yeast isn’t placed in an environment at the optimal temperature (along with other factors) it won’t be a happy camper, and your beer will suffer for it.
The simple solution is also a fairly cheap one if you have a spare fridge or freezer that you can put your fermenting beer into. More on this a little later.
New to homebrewing? Please feel free to read my ultimate guide to brewing beer at home and where to start.
Oxidation
This is a bad word in brewing circles but an unavoidable reality. Every brewer at any level has to combat the risks of oxidation which can affect the taste (old cardboard) and shelf-life of any beer. However, the last point can be less of an issue for the average homebrewer.
As soon as your wort cools down after boiling it, oxidation becomes a real risk. The only way to minimize its risks is to minimize the exposure of your wort (and later beer) to it.
This can be done quite simply by working with a fermenter that is designed to be 100% airtight and also by paying a little more for specially designed equipment. More on this later.
Sanitation
The biggest theme in homebrewing has to be cleaning and sanitizing your home brewery and equipment. You can never be too clean or sanitary.

Using the right types of cleaners and sanitizers can not only produce a better beer but also significantly reduce your brew day.
9 times out of 10 the reason for a newer home brewer’s funky tasting beer is that they didn’t quite manage the level of sanitation they needed.
Essential Equipment
So before I go on with this article, I just want to make sure we are all on the same page. Let’s talk about what the basic equipment is and what we call it in the brewing world.
Brew Kettle

A brew kettle is used to boil the wort, the sugary liquid gained from mashing or using malt extract, and hops. Shop for your brewing ingredients online at homebrewing.org
You don’t really need anything more complex than a large stockpot, but having an inbuilt thermometer and spigot can be really helpful.
For more details on choosing the right size and type of brew kettle, please see my article here.
If you like the look of the GasOne 32QT brew kettle pictured above, you can check it out on Amazon for the latest prices and availability.
Fermenter

A fermenter, or fermentation vessel (FV), is where we add the wort and yeast together. It needs to be airtight with a hole big enough for a tube or airlock.
Although I did use a homemade fermenter from plastic water containers to glass jars, I always found that they weren’t just quite airtight enough. This is why starting with a specially designed brewing fermenter is best (link to Amazon).
Airlock

An airlock is a device that allows carbon dioxide to escape a fermenter without exposing the beer to the outside air.

They are fairly inexpensive and should be used from the moment the yeast is added to the beer to when you move the beer into a storage vessel. It’s always best to have a couple on hand, so check out this 6 pack on Amazon.
Hydrometer

Perhaps one of the most essential pieces of kit if you want to accurately monitor your beer, a hydrometer measures its specific gravity.
This can tell you the Original Gravity (OG) before boiling your wort and Final Gravity (FG) after fermentation is complete. Using a hydrometer can tell you a lot about the progress of your brew and its final alcohol content.
Again they are quite cheap but prone to break as they are delicate, I always have a couple of spare ones in the home brewery.
Star San

This is to a brewer what a dog is to, well, a brewer! It’ll soon become your best friend as this no-rinse sanitizer will cut down your sanitizing job by hours.
It’s also reusable if diluted and stored in the correct way, so one small bottle can last you for many, many brews. If you can’t get it from your local homebrew shop, check out the latest deals on Amazon.
Fermentation chamber

I think that this is THE most essential piece of kit you will ever buy for brewing better beer.
Basically, a fermentation chamber is a fridge, freezer, or home-built box which allows you to accurately control the fermentation temperature of your beer. You can also use it to regulate the temperature for bottle conditioning your beer.
I would recommend getting yourself an Inkbird ITC-308 and using it with a chest freezer. I talk about this more in my full article on fermentation chambers here.
Kegs/bottles

Whereas bottling your beer is perhaps cheaper and less complicated, kegging it will be less time-consuming and will lead to more consistent beer.
For more information on choosing the right types of bottles for homebrewing, please read my article here. If you’d like to know more about kegging, I talk about the basics in another full article here.
Extra Equipment (which you should really have)
Now, you could in theory cash in your pension and still not have bought all the little brewing gadgets on the market. What follows are just those little extra things that will really save you time and effort as well as help you produce a better beer.
Auto-siphon

This is more of a “nice to have” rather than a “must-have”, although they are so affordable that it would be mad to expose yourself to the added work and risk of burns.
Basically, an auto-siphon allows you to transfer the entire contents of your brew kettle or fermenter into another vessel with a couple of small slides up and down.
Build up the suction, and watch as your beer rapidly switches from one place to another. A real time-saver and an absolute bargain, I’d say.
Wort chiller

Again, this is another piece of equipment that isn’t entirely essential but will help you save time and reduce the risk of bacterial infection in your beer.
A wort chiller allows you to rapidly reduce the temperature of your wort from boiling to the ideal temperature for yeast (pitching) in a matter of minutes. This allows you to quickly transfer it into an airtight environment, reducing the overall risk of getting off-flavors later on.
There are three main types of wort chiller and you can read about the best one for you in my article here.
Mash tun

If you aren’t brewing beer from grains (all-grain brewing) and you are using the Brew In A Bag (BIAB) method, then you don’t need a mash tun.
A mash tun is a separate vessel to the brew kettle which is used to mash grains to extract their sugars. Ideally, you need a vessel that is isothermic, but even a second stockpot could be used if you could keep the temperature of the mash constant.

Getting started: $30 – $100
Shopping list:
If you already have a large stockpot or saucepan at home with a capacity of 2 to 3.5 gallons (7.5 – 13 liters) then all you really need is something to ferment your beer in and to maintain constant fermentation temperature.
You can pick up a second had glass or plastic fermenter from Amazon for up to $50 dollars or get a brand new one for almost the same amount of money on Amazon.
For this option, go with bottle conditioning your beer. Collect up as many swing-top (also called EZ top) beer bottles from friends, bars and anywhere else you find them.
They are great because you don’t need to buy a capper or caps and you can always replace the rubber seals if they are old. Then just use the sugar provided in your ingredient kit or ordinary cane, corn, or sugarbeet sugar for priming your beer.
I recommend you invest in an Inkbird ITC-308 and use it with your refrigerator or if you have an extra one, a chest freezer. Fermentation temperature control should be your first concern.
This will allow you to still brew a pretty decent beer with just basic equipment. In terms of sanitizing your beer, check out my article on alternatives to more expensive brewing sanitizers.
Modest startup costs: $100 – $500
Shopping list:
If you have a little more money to spare, I would really recommend getting yourself a brewing starter kit. The most basic ones come with all the basic equipment you need to brew beer, but the cheaper ones won’t give you a brew kettle.
Take the Northern Brewer’s Essential starter kit (see Amazon) for example, it comes with a bucket fermenter and bottling bucket. These are two pieces of kit that could practically last you your entire career as a brewer.
There are competition winners who are still working with these fairly basic brewing implements because they work fine.
The only thing I have against a bucket fermenter is that you can’t see what’s happening inside, which often leads to novice brewers taking a peak and exposing the beer to the air. A big no-no!
Again, I would recommend that you invest in a temperature control unit, my favorite is the Inkbird ITC-308 (Amazon) which will work with any fridge or freezer. For more information on which type of chest freezer might work for you, check out my other article here.
I would also say for less than $500 total upfront cost, you could get yourself a decent brew kettle in the $100-200 range which will last you for quite a while.
Try to get at least an 8-gallon capacity vessel (Amazon) to account for when you truly get bitten by the brewing bug and want to brew larger batches.
At this price range, you will also be able to buy a wort chiller, either second-hand or brand new. Of course, you can always chill your wort with ice (see my article) or, in winter, overnight in the fermenter (see my article).
This being said, a wort chiller (Amazon) is a solid investment and will save you all sorts of headaches.
Semi-Pro startup costs: $500 – $2000
Shopping list:
At this stage I would still start with a brewing kit, especially the Premium starter kit (see Amazon) from Northern Brewer. It seriously comes with everything you need apart from for temperature control, mashing, and kegging.
Again, I would recommend the Inkbird ITC-308 as your temperature control unit and to buy yourself a dedicated chest freezer for fermentation and, if you want to, kegging in the future.
If you are willing to invest this amount of money into your first brewing experience, you’ll probably eventually want to go down the all-grain route. If you don’t choose the BIAB method, then you’ll need to also get a mash tun.
You can either buy something ready to go like the Igloo 10-gallon set up, available on Amazon, or you can build your own mash tun from a regular beer cooler.
All-in-one systems
An alternative to buying lots of individual pieces of kit is to take advantage of one of the many all-in-one brewing systems which are available on the market.
Their main advantage is that they give you a little bit more control over the standardization of the brewing process as many units offer pre-programmed functions and general automation.
An all-in-one brewing system also allows you to brew a little more around your daily tasks as you don’t necessarily need to supervise each stage of the process as much as you would using more traditional methods.
Again there are different price levels with different features.
Entry-level

If you want to keep the costs down but still benefit from a little bit of automation then the Brewer’s Edge (see Amazon) may be a good option. It automates the mashing and boiling stages of all-grain brewing, but still leaves cooling the wort to you.
Easy brewing systems

If you’ve gotten this far in this article and are thinking “I don’t want to brew, I just want to drink”, then the BeerDroid (see Amazon) may be a good option for you.
It’s the equivalent of a coffee machine but for brewing and would be ideal for the beer lover who isn’t too eager to jump headfirst into the homebrewing chasm.
This all-in-one system will make small batches of beer from start to finish at the touch of a button and will be perfect for busy brewers.
Pro homebrewer

The GrainFather brewing system (see Amazon) comes with everything you need to brew your beer from all-grain ingredients right up to the moment you close it up in your fermenter.
It’s fairly compact and, from my experience of brewing with a friend on it, very easy to use. It will take much of the chance out of brewing and allow you to finally concentrate on tweaking the elements which will really lead to better beer.
Extract vs All-grain
There has always been a bit of a debate among homebrewers over which type of brewing method, extract or all-grain, is better.
In reality, there has been a shift in brewing towards all-grain since better ingredients have become available. The truth is that you can really make a decent beer with either method.
However, what cannot be ignored is that in general brewing all-grain beers will cost you more in your initial costs because you have to buy more equipment.
This is simply because all-grain brewers need to extract the sugars needed for fermentation themselves whereas extract brewers use a ready-made malt extract to achieve this.
So at the very least expect to add $100-200 extra on your start-up costs to buy a mash tun and hot liquor tank (to hold your strike and sparge water).
This being said, you can avoid these costs while still brewing all-grain recipes by going down the BIAB route.
Go down the BIAB route
Brew In A Bag (BIAB) is exactly what it sounds like, you use a brewer’s bag or muslin bag to place your malt grains in while you mash them. See my article for even more information.
As you can mash your grains in the same pot you’ll be boiling the wort in, you don’t have to put up the money for another one or two containers.
I personally opted for this method because I don’t have a lot of space to brew in and it was purely a question of storage in my case. But from a budgeting perspective, I would recommend BIAB brewing
Learning the trade
The last thing to think about, which I suppose is in reverse, is your brewing education. Learning everything you can about your new hobby is really going to help you make your first great beer.
Free Resources
Luckily we live in the internet age and there are so many free resources out there to learn from, hey you are even on one now!
I recommend that you join some Facebook Groups and start listening to some podcasts, I quite like the BeerSmith and Experimental Brewing podcasts.
There are also plenty of great Youtube channels out there which are for both entertainment and education. I’m a big fan of Martin Keene and his “Homebrew Challenge” channel as well as the quirky Classhammer Supply channel. You can also check out my own homebrewing channel here.
In addition to learning through these free resources, I would really recommend you get some homebrewing books.
Homebrewing Books
How To Brew (John J. Palmer)

This is possibly the most popular homebrewing book for beginners, and for good reason. It is a great starting point and I often go back to it on my kindle whenever I have a doubt about a process.
Check latest prices and availability on Amazon
The Complete Joy of Homebrewing (Charlie Papazian)

This is another great addition to your homebrewing bookshelf and covers a wide range of beers and styles of brewing.
Check latest prices and availability on Amazon
Lager (Dave Carpenter)

I absolutely loved this book as I’m a history nut and was totally converted from someone who looked down on lager to someone who loves exploring the immense possibilities of brewing lager as a homebrewer.
Check latest prices and availability on Amazon
Designing Great Beers (Ray Daniels)

This book is ideal for a homebrewer who has a few batches under their belt and wants to start experimenting with what they can do. It’s full of the basic principles of making fantastic beers from your own head.
Check latest prices and availability on Amazon
More Recommended Gear
For more information about what you should and shouldn’t buy, please check out my recommended gear page here.
