
When we think about a pint of beer, most of us will unconsciously conjure up a crystal clear pale colored lager, perhaps the star in a beautiful summer scene.
There’s nothing wrong with that. Almost all of the beer sold around the globe is that variety of beer.
So, for the budding homebrewer, anything that doesn’t come out of the fermenter looking so terrifically transparent may have them scratching their heads.
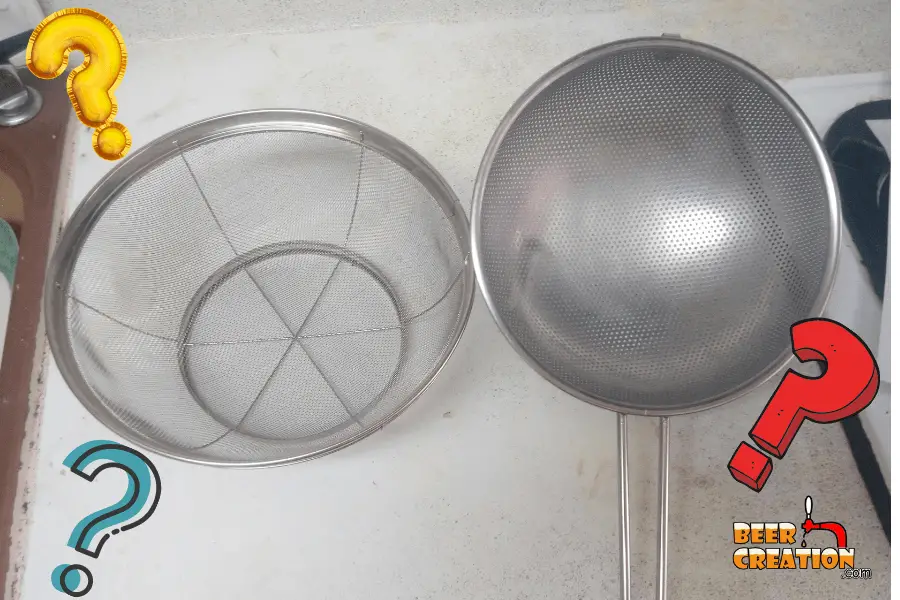
If you have a cloudy beer or even nasty little green things floating around (actually they are hops and one of our best friends), the obvious answer is to filter or strain that beer, right?
Straining organic matter from homebrewed beer is generally unnecessary & possibly problematic, especially on the cold side of brewing. The major dangers are the oxidation of beer in the bottle and/or the introduction of bacteria. A clearer beer can be achieved with better preparation or equipment.
If you are reading this just before picking up some form of filtering utensil, great! There are somethings you should know before you leap.
If you’ve already done it and the beer is in the fermenter or bottles, read on anyway so you don’t make the same mistakes later
Why Would You Want To Strain Your Homebrew?
Personally, I found that with my early batches of homebrew at the very start of my homebrewing journey, there was a lot more floating around my fermenter and bottles than just beer.
It’s common for homebrewed beer to have organic matter floating in it left over from the mashing and/or boiling phase. At best this flotsam is offputting to the viewer, at worst it can affect the final taste of the beer. So trying to remove it is often the first reaction. Better control of the brewing process can stop this from happening.
Some of the biggest culprits of ‘imperfect’ beer are:

Hops
Hops are absolutely essential in most modern beer recipes (see my article here on hopless beers).
When using whole hops or hop pellets it’s more than possible that some of this wonder ingredient will make its way into your fermenter and even your bottles.
I’ve found that when you simply add hops to your boil, at any point, they can quickly disintegrate and spread over the surface of the wort. This is especially true of hop pellets and when they are given their freedom (more on this later).
Yeast
After fermentation you are just as likely to run into the issue of yeast which is still suspended in your beer, which will make it look extremely cloudy.
Depending on the yeast strain this might actually be what should happen, but if you are brewing something like a clear Pilsner, then the yeast has probably still got some work to do.
If you’ve just relocated your fermenter in anticipation of your bottling day, this could also lead to more yeast being in suspension (even if it has previously flocculated).
Grains
If you are brewing an all-grain recipe, then having loose grains hanging around could be an issue, assuming you aren’t going down the BIAB route.
More than likely, this will be an issue you’ll face as you rack your wort into your brew kettle but it’s still possible to see some grain particles as late as at bottling time.
However, I would say that in my experience this is quite rare unless you have an issue with your grain bed during lautering, especially if you are rushing this phase.
Haze
Having a hazy beer, although popular nowadays, may not be what you set out for. This can be caused by a number of things, but chill haze is quite common.

This happens when the beer is, well, chilled, and is a result of additional proteins present in your beer.
Often these come from things like specialty grains which have been added to the grist purely for color or improved head retention and/or mouthfeel.
To be honest, the slight haze you’ll get is a price worth paying for an improved beer character. But that’s just my humble opinion.
What are the dangers of straining Homebrewed beer?
Trying to strain or filter your beer before bottling it could lead to a reduction in its quality and taste. This is most likely to happen as a result of oxidation from additional splashing or allowing the beer to come into contact with poorly sanitized equipment or surfaces.
Straining beer could lead to oxidation
If you’ve been brewing beer for any length of time, you know the dreaded word ‘oxidation’, which is paramount to a cuss word in the brewing world.
On the hot side of brewing (anything before we chill our wort before pitching it) oxidation, or adding oxygen to the wort, is great. We love it. Give Me more!
Any time after pulling out the wort chiller or dumping your brew kettle in an ice bath, we hate that dread O2!
Basically, by straining your beer after fermentation, you run the risk of adding additional oxygen to your brew at the worst possible time.
A sieve, cheesecloth or any other form of straining utensil is going to result in some form of splashing, and that is bad news for your beer.
So, at this stage, it’s best just to rack your beer carefully into the bottles, floaties, and all.

I’d rather drink my homebrew through my teeth, than have something which tastes of old wet cardboard (seriously, which homebrewer had licked a box and make that culinary connection the first time?)
New to homebrewing? Please feel free to read my ultimate guide to brewing beer at home and where to start.
Straining beer, another chance of infection
In addition to running the risk of introducing oxygen into your beer at the worst possible time, you could also be exposing it to bacteria in the air or on your equipment.
Just like with oxidation, you need to be EXTRA careful when dealing with your beer on the cold side, especially in terms of sanitation.
You could very easily fail to clean your filtering utensil and quickly add micro-organism into your beer (or wort) and this would be much worse than having floaties or a cloudy beer.
How To Reduce Floaties In Your Homebrew
In order to reduce unwanted organic matter in your beer, you need to ensure you use clean equipment and use the right kit in order to reduce this from happening. Using a bazooka filter and hop spider for your mash and boil respectively will greatly reduce floaties as will carefully moving any fermenter you have.
Start with a clean slate
A good precautionary step is to always make sure that your equipment is completely clean before you use it, especially your fermenter and bottles.
I generally make sure that I clean my equipment as soon as I’ve stopped using it. This seems to make the entire clean up process easier.
So, for example, take your fermenter and empty out any remaining yeast and trub you don’t want to keep and immediately fill it up with hot water and some PBW (I get mine from Amazon if it’s not available at the local HBS).
Just soaking it for a while and then cleaning it with an appropriate cloth or sponge will get rid of all of the organic material, hops or grains, etc., hanging around.
If you are bottling with previously used bottles, make sure that you really clean out the residual yeast from the bottom of the bottle. This can significantly alter your beer’s taste, but also risk things like exploding bottles from over carbonation.
Keep your hops in check
When I first started brewing the hops I used would really get all over my brew kettle and my stirring spoon and invariably find its way into the fermenter.
To be honest, if you are using hop pellets you won’t get huge floaties on top of the wort, but it can clump up.
I’ve even seen hops stay on top of my fermented beer because it was pushed up with the krausen early on in the growth phase of fermentation.

The best method to stopping this is to keep the hops in check. You can either use a small brewers bag (see Amazon for prices) that floats around in your wort during the boil or, my preferred method, get yourself a hops spider (I got mine on Amazon) and allow the hops to boil within that.

I prefer a hops spider just because it’s easier to lift out. However, I have found that with hops heavy beers, especially using hops pellets, you may want to have a long spoon on hand just to unclog the walls of the unit to allow for better water flow.
Honestly, this could just be an issue with my particular unit.
Filter your mash
If you find that it’s grains that are causing your floatie issue, then the problem is more than likely coming from the mashing stage of your brew day.
Some of those grains are making it through to your brew kettle.
The best way to stop this is to establish a good grain bed which will filter your wort properly. This not only extract the maximum amount of fermentable sugars into your wort, but also helps lock in most of the spent grain.

If this is what you are doing and it’s still not working, then perhaps move over to the Brew In A Bag technique, which will make sure that grain really has nowhere to go.
I personally favor this method as I have limited space to brew in and I find that it’s much easier to remove the spent grain from the wort by simply taking out the brewers bag it sits in.
If you are confused about how sparging works with the BIAB method, then check out this article I wrote on the subject.
If you have your conventional all-grain system set up or you’ve just invested in a seperate mash tun and strike water tank, you might not be best pleased about chaning track now.
Don’t worry, there is a simple solution for you too.

A Bazooka mesh screen is a little filter you can attach to the ball lock spigot on your mash tun or brew kettle. It sits on the internal side of the vessel and catches any large particles that try to get through the faucet. It’s a really affordable solution to this issue.
Easy does it
As mentioned above, another reason that you might have a cloudy beer is because of yeast hanging around, literally, in the beer.
Now, if you are brewing something like a New England IPA or a German Wheat beer, this is probably what the recipe intended for. If anyone is putting up a fight about drinking beer in this state, get them to read this article about cloudy beer.
however, yeast isn’t always meant to be suspended in your fermented beer. If it’s been recently moved and sloshed around a bit, then it’s likely that the yeast cake/ trub has been kicked up.
This is why you need to be extra careful when moving a fermenter around and why leaving it to settle for a few hours before racking it to a keg or bottles is highly recommended.
Alternative ways to get a clearer beer
If you’ve already tried all of the methods above with no noticeable improvement, you may want to try one of two things, a longer fermentation period and cold crashing.
Extending your fermentation time
One issue that you may have is having too much yeast suspended in your beer after fermentation.
Of course, if you are bottle conditioning your beer, you do still want yeast present in the bottle so that it can react with the priming sugar that you add.
Most ale recipes that I’ve come across say that fermentation can be achieve in about a week to 14 days. However, my professional brewer friend always advises me to leave those types of brews in the fermenting vessel for at least 2 and a half weeks.
This will give the yeast ample time to completely finish attenuation and won’t have any negative effects on your beer. This will also ensure that you have a much clearer beer by the time you bottle it.
Cold crash your brew
Another way to clear up your beer is to cold crash it by reducing the temperature to about 35-40°F (around 2-4°C) about 3 days before you want to bottle your beer.
This can be done in a spare fridge or, at a pinch, on a cold day in your basement or somewhere like that. Personally, I always use my Inkbird temperature controller (see Amazon) to help me to do this. I actually have two for two different fermentation chambers.
Should you have yeast in the bottom of your bottled beer?
A small amount of yeast at the bottom of bottle conditioned beer is absolutely normal. There isn’t anything wrong with ingesting this yeast, in fact it can be quite nutrious. This being said, agitating the bottle before pouring it can make it taste ‘yeaster’ than expected.
Generally, if you are pouring a bottle of carbonated beer you should try to leave the last half to an inch of beer in the bottle. Again this isn’t because the yeast is harmful or anything like that, it’s just that it may not taste great in such high concentrations.
