
No matter how long you have been brewing, there’s still something magical about watch each brew develop. One of the most dramatic visual spectacles for me is the rapid formation of krausen.
So, in case you were wondering what exactly do we mean by Krausen?
The term Krausen is derived from a German word for ‘curly’. It describes the foamy build-up on the surface of beer that occurs in fermentation caused by yeast. Krausen can be a good indicator of both the start & end of fermentation. This should be confirmed by measuring the wort’s Specific Gravity.
Not only is krausen a cool thing to look at and confirms that you can actually make beer yourself, but it also has an important role in the brewing process.
In the following article, I’m going to go over everything you need to know about krausen and turn you into an instant expert!
Krausen pronunciation
For most of us native English speakers we are intensely allergic to foreign languages even though our language is full of their influences. Even I as a fluent French speaker have never been able to lose my intensely ‘Anglo’ accent when conversing with the population of La Belle France.
So how the heck do you actually pronounce all these brewing words like Krausen?
Well if you are really eager, go on to google and type in ‘Google translate German to English Krausen’ and you’ll be able to click on a little volume/sound button to hear a robot German saying it.
Basically the word is two syllables and sounds like the sound you make when you stub your toe (no, I meant ‘ow’ not ‘F***’) with a ‘Kr’ in front of it and the thing new-age hippies use to describe being calm, zen.
So Kausen becomes ‘Krow – Zen’. Just try and fight the urge to click your heels every time you say it and follow it up with ‘ Ja, ist gut’, or is that just me? Anyway, now you know how to say Krausen with confidence.

What is Krausen made of?
Just like Dr. Frankenstein, krausen is a sure sign that your brew monsters (yeast) are alive and well. As I have briefly covered, krausen is the result of yeast starting the process of fermenting your beer, i.e. turning sugars into lovely ethanol and carbon dioxide.
The foam which is pushed up from the surface of the beer (because it’s been pitched with yeast by this stage) is a mix of both living and dead yeast cells as well as proteins and other compounds in the beer. It tends to build quite quickly in a highly active attenuation phase and can stick to the roof and walls of your fermenter.
For the most part, the material found in the krausen isn’t something we want to actively reintroduce back into the beer. So, don’t feel like you need to open the fermenter and scrape the krausen off the walls and mix it back in. Actually, this foam is rather bitter and you may not want to introduce that flavor back into the beer.
A less active fermenting beer may only produce a thin layer of krausen, so always check that your beer has truly completed its fermentation by taking a specific gravity reading. If you aren’t sure how to do this, check out my article on using a hydrometer here.

Is Krausen a sign of fermentation?
As a general rule, yes, the formation of krausen is a fairly good indication that fermentation of your beer is in full swing, however, it shouldn’t be taken as the only sign of this process.
When you pitch your yeast into the wort, if the yeast has been stored correctly and added at the correct temperature, you should see some changes fairly quickly. Within a few hours an up to a day, you’ll start to see bubbles forming on the surface of your beer.
Soon after this, you will notice a lot more activity and the bubbles will be replaced with the foamy material dubbed krausen. So, yes you can be sure that now your beer has well and truly started the process of fermentation.
However, if you come back to your fermenter later on and notice the krausen has dried up or disappeared altogether, it doesn’t necessarily mean that fermentation has stopped, especially if it’s only been a few days or hours.
In fact, there are many reasons why fermentation can become stalled or appear to have stopped working. If you want to find out more about this, I’ve written an entire article on the topic which you can check out here.
So, just because your krausen stops developing or has suddenly sunk down into your beer, make sure that you don’t rack your beer too soon. Take a specific gravity reading and make sure that you aren’t being led astray by what you can only see.

Does Krausen go away?
For most yeast strains the krausen is directly connected to the suspension of the yeast particles in the beer. Once the yeast begins to die or reach its capacity of fermenting so to speak, it will flocculate. This basically means the yeast will drop out of suspension and fall to the bottom fo the fermenter as trub. When this occurs the krausen should drop too and help to clarify your beer as it goes.
However, some beer recipes using certain yeast strains will take a lot longer to flocculate and you may not see the krausen disappear for many weeks. In these cases, check if you have reached your target final gravity using a hydrometer or refractometer.
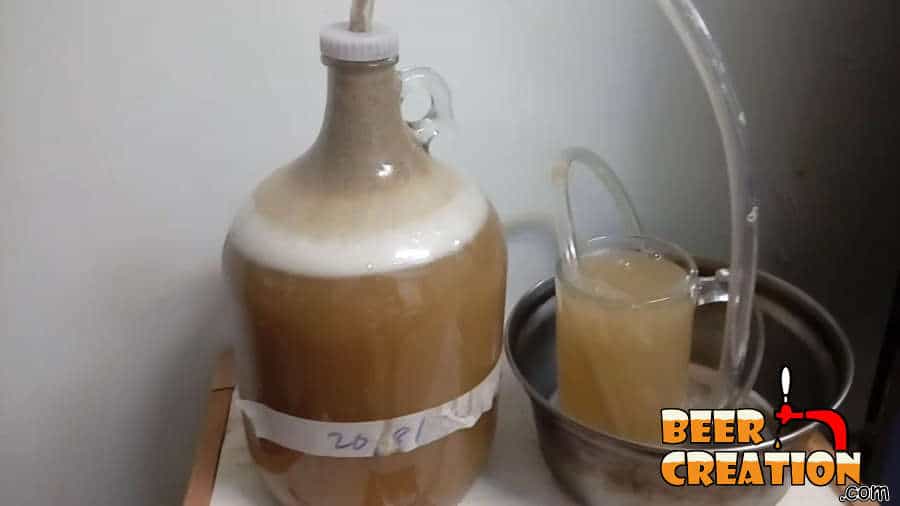
Another scenario may be that you are simply looking at the caked remains of the krausen on the top of your fermenter, this is especially true for glass carboys. If the krausen isn’t actually sitting on the surface of your beer, then it’s likely stuck there and won’t drop when the rest of the yeast ‘calls it a day’.
Should beer with krausen on top be racked?
Although it’s true that krausen will more often than not naturally fall back into the beer it came from, we don’t want to force it back there. As I said before, actively mixing your krausen back into the beer can make it taste a little off. So, what do you do if you know your beer is ready for the bottling or kegging phase but you still have a thick foamy layer to deal with?
Well, you will have to perform a precision job which would rival Tom Cruise in mission impossible; siphoning your beer out of your fermenter from above the trub and below the krausen.
Depending on the fermenter you have been using this may be achieved with varying degrees of difficulty. By this I mean, if you have been using a carboy with a narrow neck you have less space to work with than a wide-rimmed bucket-style fermenter.
For the latter type, sanitize a wooden spoon and ‘cut’ a hole through the krausen to reach that lovely beer below. Then insert your siphon tube (I recommend an auto-siphon if you haven’t invested in one yet, see my recommended gear here) through the hole you made. Make sure that it remains at least an inch under the surface and an inch above the trub at the bottom. You may have to leave behind a little more beer than you may do otherwise.
If you have been using a carboy, it may be a little harder to cut a hole through the krausen in an effort not to suck it up the siphon tube. I suppose that you could use a long thermometer or similarly shaped utensil to make an opening for your siphon tube. Then, as before, try to place your siphon tube so that it doesn’t risk driving any waste trub or unwanted krausen into your bottles or keg.
Plenty of Krausen but no airlock activity
If you are fairly new to brewing it can be very worrying when you don’t see happening what everyone else seems to be describing in comments or in videos. Don’t worry, beer brews in mysterious ways but normally works out fine.
If you have noticed a very active beer with lots of krausen developing but then very little airlock bubbling, don’t panic. A lack of escaping gas through your airlock doesn’t mean that fermentation isn’t healthy and strong.

One common cause can be that you have some sort of air leak in your fermenter. If you are using a bucket-style fermenter, that leaves you with a lot of room for air to escape. A carboy will have fewer suspect areas to explore. Generally, an air leak is something that you don’t need to fret about until you can work with the empty fermenter again.
In the short term, wrap some food plastic wrap (Saran wrap /Cling film) to try an limit the exposure of your beer to bacteria. If you have some sanitizer handy, then make sure you soak the plastic in it to be safe.
When you have the chance, you can try and fix the problem for good by using baking soda in the empty fermenter to simulate yeast activity and then soaping the exterior of your fermenter when it’s closed.
Use enough baking soda and you should see some bubbles in the soapy water on the outside. Then when you figure out where the leak is coming from you can either update your rubber seal or put some non-toxic silicon filler on the offending area. Alternatively, just upgrade the fermenter for a better quality one. Check out my article on little to no bubbling in your beer!
Related articles
As you have read this article, you may be interested in finding out exactly how to use a hydrometer to test the gravity of your beer. If so, check out my article on this topic: Do I Need a Hydrometer For Home Brewing Beer?
Also, perhaps you are having doubts about your current beer’s fermentation, in this case, I’d recommend my article about fixing a non-fermenting beer: Why Your Homemade Beer Isn’t Fermenting And How To Fix It?