
I can still remember brewing my first beer and thinking, “wow, it’s getting pretty tight for space in there!”. Looking back on that first experience, I probably didn’t even realize I needed to leave a certain amount of headspace in the fermenter.
Since then, I’ve learned from my mistakes, and I wanted to talk about that today. So, how much headspace should you be leaving in your fermenter exactly?
You need enough space to allow gases to safely escape the fermenter without leading to an explosion while simultaneously giving the foam (krausen) produced enough space to expand before sinking back into the beer. As a general rule of thumb, 20% of the total batch size area is needed as headspace.
This may sound quite cut and dry, but there are actually some other factors which are at play here, so feel free to carry on reading to find out more.
New to homebrewing? Please feel free to read my ultimate guide to brewing beer at home and where to start.
Why do you need to leave headspace?
The fact of the matter is that you aren’t really brewing beer at home, you are a mad scientist carrying out controlled chemical reactions, and that’s exactly what fermentation is.
As attenuation, or fermentation to you and me, starts to occur the yeast present in your beer (since you pitched the yeast it’s now called beer) now begins to consume the nutrients within it. As this is basically a chemical reaction, it produces by-products, one of which is carbon dioxide.
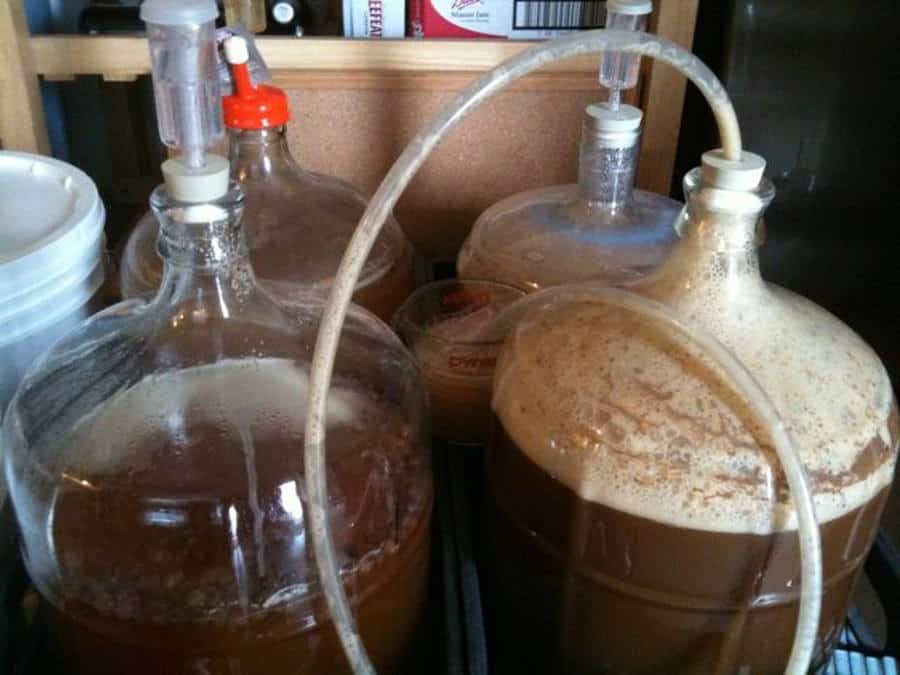
Of course, there are other gases that are produced during the fermentation process, but CO2 is by far the most abundant. In the early growth stage, within the first couple of days of fermentation, that CO2 will rise up out of your beer and combine with other compounds in the beer to form a foamy layer called krausen. (see my article for more information on krausen).
Reason #1
So, it’s because of krausen that we need the headspace in the fermenter. Although it looks like waste material or something quite disgusting which we wouldn’t want in the beer, it’s actually quite important.
When the krausen sinks back into the beer later in fermentation, it gives us back some of those compounds which form it. These compounds, proteins for example, will help contribute to things like the head retention of your beer.

Reason #2
Another reason to have headspace in your fermenter is that it acts as a barrier between your beer and the outside world. Although your airlock or blow-off tube takes on most of the role as gas barrier between the inside and outside, headspace also plays a role here.
As CO2 builds up inside the fermenter and before it escapes through the airlock, it helps to purge any oxygen left in the fermenter and to keep it out for the entire fermentation period.
This is really important because it protects your beer against too much exposure to bacteria entering your beer and the process of oxidation, which will leave it tasting like band-aids or worse.
How to measure headspace more accurately?
I’m sure that you could sit down and use a formula to work out the exact headspace you needed for each batch down to the exact inch, but who’s got time for that, right?
Rather, you should be aiming for a rough range when it comes to your headspace. As said before, about 20% (according to John Palmer) is going to be pretty much on the nose when it comes to leaving enough space. So, if you are brewing a 5-gallon batch, that’s about 1 gallon in terms of space. 10 gallons of beer requires about 2 gallons of space, etc.
So, the main two things you need to know in order to get a close approximation of how much space you need in your fermenter are a) the total capacity of your fermenter and b) the quantity of beer you are brewing.
So, let’s talk about a couple of ways that you can find out both pieces of information (assuming the manufacturer didn’t tell you its total capacity) and then use it to get the exact quantity of beer for your batch each time.
Measuring tip #1: by weight
Raid the bathroom and steal your wife’s (or significant other’s) stand on scales. Either “tar” the scales with your empty fermenter on to get a zero starting weight, or take a note of what the empty weight is so we can deduct it later.
Remember, 1 gallon of water has a specific gravity of 1.000 and weighs 8.34 lbs ( or 1 liter weighs 1 kg with 3.78 liters in a gallon).
Simply fill up the fermenting vessel to the brim and you’ll know the exact capacity of your fermenter, just make sure you reuse that water for cleaning or something.

When it comes to brew day, you can use the same method to weigh your wort and be sure that you have the exact amount you should by adding extra water if needed.
Also remember that when you fill your fermenter with wort later, it’s not going to have the same specific gravity as plain old water, so just take this into account. The actual difference will be small, but it’s worth getting these thing right!
Measuring tip #2: measuring stick
Ok, less high tech but still just as accurate (well sort of), you can use a stick to measure how far you should fill your fermenter up and how much headspace you need to leave.
If we assume that you haven’t got a way to measure the weight of your fermenter, you can use simple math to figure out the total capacity of your fermenter by area.
A = 2πrh + 2πr2
Another way is to use a large bottle of water, and fill up your fermenter until you’ve added 1 gallon, you can just get a gallon bottle from Walmart for example. Once you know how much space 1 gallon takes up, you can use a wooden spoon, length of wood, etc to figure out how much space 5 gallons would take.
Measuring tip #3: measuring line
Another visual way to measure out your batch sizes, and thus how much headspace you should leave, is by drawing lines on the outside of the fermenter.
You’d have to go about finding the right level for, say, 5 gallons by using tip #1 or tip #2 above, then use a permanent marker and draw a line around the fermenter. My advice is to make sure you can’t remove the line simply by washing it, otherwise, you’ll be doing this every time you want to brew a beer.
You can check out my article “How To Measure Water For Brewing (With & Without Equipment)” for more information on measuring water in strange and beautiful ways.
When might you need more headspace?
As the amount of headspace we need to leave is directly connected with the activities of your yeast, you need to be aware of how different factors affect the fermentation process.
Temperature
If you are fermenting your beer at a too cold of a temperature, then your yeast will be less active and so there will be less krausen and carbon dioxide production. However, when the yeast is even a few degrees above the recommended temperature range, they can be very active indeed.

Even though they may be less effective at turning fermentable sugars into ethanol, they may produce more CO2. So be very vigilant of how hot your brewery is and also how hot the batch is, remember fermentation is an exothermic process!
Yeast strain
Although all from the same species, brewing yeast has been designed and developed over the last hundred years or so. Different varieties of yeast will perform in different ways, some even producing more carbon dioxide and krausen than others. So, when you know you are working with a strain like this, just be prepared.
Also, some wild yeast strains which you may be using if trying to copy a lambic beer, for example, can also produce more excess by-products than regular yeast types.
How much headspace for a secondary fermenter?
The general consensus when it comes to primary fermentation is to leave AT LEAST 20% extra space in the fermenter so that you don’t get a mess from krausen exploding out of your fermenter or blow-off tube.
However, when it comes to secondary fermentation you probably want even less headspace than in primary fermentation. There is no clear-cut answer, but even 10% extra space would probably be just dandy for secondary fermentation.
Whereas using a fermenting bucket for primary fermentation is absolutely fine, and probably OK for secondary, you probably should be using a glass carboy instead.
Usually, you’d move your beer from your primary fermenter to your secondary fermenter (if that’s what you’re into) just after the growth phase of fermentation began to slow (see my full article on when to move from primary to secondary fermenters for more details).
This is actually a dangerous time for a young beer as exposure to oxygen can be worse than the exposure to the trub, which is why some brewers actually use secondary fermentation. Also, there is less CO2 being produced in the stable stage of fermentation, so you don’t have as much to fill the headspace and leave a protective barrier.
So, this is why it’s best to use a glass carboy, being less permeable than plastic, rather than a plastic fermenting bucket. Carboys normally offer less additional space in them than fermenting buckets.
Dangers of not having enough headspace in a fermenter
Exploding glass carboys
Now, this hasn’t happened to me but I have heard other homebrewers in the community talk about this. In the right conditions, glass carboys can explode due to the pressure from fermentation gases.
This would happen due to a combination of less headspace, a blocked airlock or blow-off tube, and weakness in the carboy itself.
Solution:
You can avoid using glass carboys in primary fermentation if you are really that nervous. You should also monitor your beer to make sure that the airlock/blow-off tube remains clear.
If it does get clogged, just remove it. The escaping CO2 will stop any air from getting into your beer while you clean it and then replace it. In addition to ensuring a clean airlock, make sure you are leaving at least 20% extra headspace.
Escaping krausen
Although less life-threatening than the first danger I mentioned, it could leave your beer a lesser version of itself.
As I mentioned before, krausen may look like something very nasty but it’s an essential part of the brewing process and when it sinks back into your beer it can provide several important elements to your finished beer.
If most of your krausen is lost through your airlock/ blow-off tube, you are still going to have a good finished beer (assuming you did everything else right), but it’s better to keep all that lovely foam inside the fermenter if you can.
Solution:
If you see that the krausen is starting to flow out of the fermenter despite your airlock, just remove it and allow more CO2 to escape your fermenter more quickly.
You can place some cheesecloth or a muslin bag/ brewer’s bag over the mouth of the fermenter to stop anything nasty from falling in and then leave it for 5 minutes or so until the flow slows down. You might have to do this a couple of times over the next few days, but it’s one way to save as much krausen as you can.
Oxidation
If you really hadn’t left any headspace at all and the surface of your beer was literally at the top of the fermenter, then this could happen. Without a blanket of CO2 wafting off the surface of your fermenting beer, I think it’s very likely that oxygen could come into contact with your beer and ruin its overall flavor.
Solution:
Make sure that your fermenter is large enough for the batch of beer you want to brew plus that important extra 20% of space!

What type of fermenting vessel to use
You can pretty much use any container which is food-grade and can be air-tight. Generally, though, I’ve found that the specially designed brewing fermenting vessels are best simply because they come with pre-drilled holes for airlocks.
Starter kits

Most decent starter kits are going to come with a fermenter as part of the package. These are great and to be honest, you can probably brew with the plastic fermenting bucket or carboy from a starter kit for many years to come.
In terms of what you get in it, including the two fermenting buckets (one for bottling use too), you can’t go far wrong with the 5-gallon Northern Brewer starter kit which you can get directly from their online store or on Amazon.
Plastic Fermentation bucket

For many homebrewers, this is simply the best way to ferment beer and they never need to look anywhere else. I think fermenting buckets are great for primary fermentation, in particular, as they offer a fair bit of headspace. However, unlike their plastic or glass carboy cousins, you can’t see any of the exciting fermenting action as they aren’t transparent. A small compromise though.
If you need to buy one, then I quite like the ALE PAIL brand and this particular model, (also available on Amazon) it’ll give you plenty of headspace and comes with an airlock, which is one less thing to buy separately.
Carboys

Generally, carboys are great for all stages of fermentation, but perhaps better for secondary fermentation than fermenting buckets. The only issue I’ve had with some models is that they are tough to clean just because the mouth of the carboy is so narrow.
So, for this, you really need to go with a Big Mouth Bubbler, again from Northern Brewer. They give you all the advantages of a regular carboy but are just easier to get your arm in and scrub away the hoppy and yeasty mess. You can check out the latest prices over on Amazon.
Stainless steel fermenters

If you want to really up your game, then brewing in a stainless steel fermenter really is going to give you a better-finished beer. Just like professional brewers, you can take advantage of the conical design of the SS Brewtech fermenter which pretty much means that secondary fermentation isn’t that necessary.
I like that it also has a spigot, which you can use to rack your beer into a keg with a lot less risk of oxidation. Check out all the details for the SS Brewtech fermenter on Amazon, or beg your local homebrewing store to order one in for you!
If you want to know more about your options and whether you should go down the plastic fermenting bucket route or with carboys, check out my full article: Should You Use A Bucket Or A Carboy For Primary Fermentation?
Can you have too much headspace in a fermenter?
I was puzzling over this question while planning to write this article. I think that the answer is no, within reason.
Assuming that you are fermenting your beer in an airtight container with an airlock, you can have much more than the minimum 20% additional space generally recommended.
As the two main functions of leaving headspace in a fermenter are to give the process of fermentation enough space to expand into with the total loss of the krausen through the airlock as well as providing a protective barrier of carbon dioxide to prevent oxidation or bacterial infection, more space could allow for this too.
The simple fact is that gases expand and so the CO2 would fill up whatever space you gave it, keeping the beer safe from oxygen and off-flavor-producing bacteria.
Do you need to leave headspace in a keg?
Unlike in a fermenter, you don’t really need to leave any headspace in a keg. By the time it reaches your keg, your beer is already fermented so doesn’t need space to ‘grow’ into.
All you really need to is use your carbon dioxide supply to purge any leftover oxygen that may have gotten into the keg, then as you drink your beer that carbon dioxide layer will expand into the space left by the rapidly disappearing beer.
However, if you are thinking about fermenting your beer directing in the keg, perhaps taking advantage of natural carbonation, then yes you’ll need to leave headspace just as you would in any other fermenting vessel.