
A good friend of mine is the head brewer at a local brewery, so somewhat of an expert on brewing beer, and during my first brewery tour, I asked him a bunch of questions. One of them was about yeast, and I was surprised to learn that they also used dry yeast at his brewery.
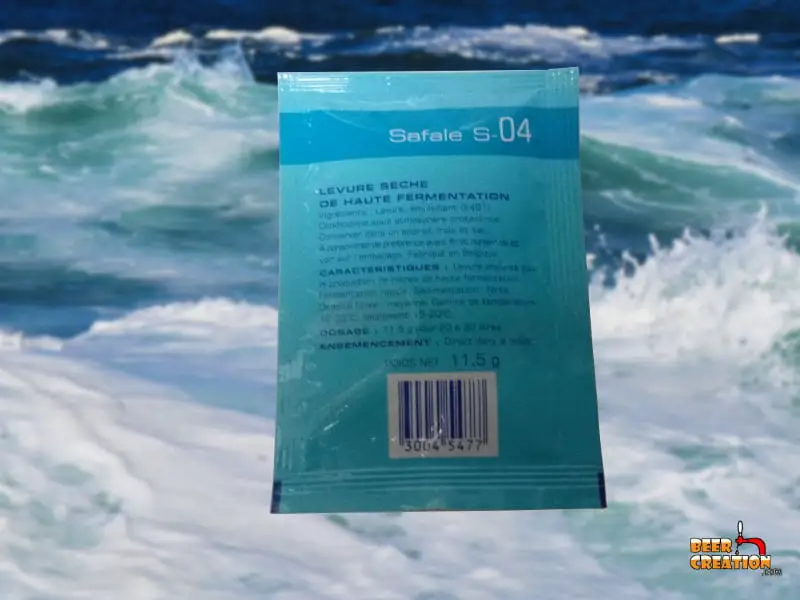
Most of my early experience with brewing beer at home was with pre-prepared kits I bought off the internet. They almost always come with the dried yeast packets which even my brewer friend uses (though in kilo bricks).
The thing is, before chatting to him I could never get a definite answer to whether or not rehydrating yeast is necessary for homebrewing?
In most cases, it is not necessary to rehydrate your yeast for homebrewing. “Fresh” dried yeast will perform well fairly just by sprinkling it on the surface of the wort. For old yeast, rehydrating it might reduce the probability of having issues such as low attenuation or overly stressed yeast.
After doing a lot of research and talking to professional and amateur brewers, I really get the feeling that trends have changed when it comes to rehydrating dry yeast.
If you look at some older recipes, the directions will say one thing and the packet of “modern” yeast may say another. So, what is the right answer? Well, that’s the subject of this article.
Why rehydrate yeast?
As you have been reading, this is a very “hot” topic for homebrewers and since most kits and instructions don’t have this step it may seem that there is no need to do it.
This is, of course, your choice. I can tell you that you will get a fermented beer if you just sprinkle the dry yeast into your wort, but what are the arguments against just doing this?
Well, the strongest one is that it would be best to revive the yeast before it enters the wort.
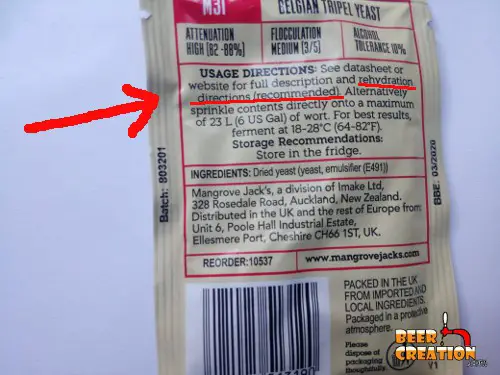
While the instructions may not always say it specifically, companies that make dried yeast do usually recommend that you hydrate the yeast before you pitch it.

It is kind of like ketchup, while it may be ok to leave it on a shelf, the manufacture recommends that you refrigerate it for the best conditions.
The main reason for you to rehydrate the dry yeast is for the yeast cells to bring water across their cell walls. This allows the cells to kickstart metabolic activity and get going again.
If you were to just pitch the dry yeast into the work without this the cells could die. There may be too much-concentrated sugar in the wort and this will not allow water to enter the cell walls, and this means no metabolic activity.
The long and the short of it is that rehydrating the yeast beforehand will help to ensure that when you pitch the yeast it will convert the sugars into alcohol more efficiently.
However this being said, I’ve never actually done this and my beer has always turned out fine, but could it have been better?
How to rehydrate yeast?
It is quite easy actually to rehydrate dried yeast and, yes it may take a little bit of time but it should pay off in the taste of your beer.
One of the biggest rules of homebrewing is that you need to be sanitary. This process is not exempt from that rule and could this idea could be even more important here as you are dealing with a living organism that can be affected easily by mismanagement.
Check out the steps to rehydrating yeast below.
New to homebrewing? Please feel free to read my ultimate guide to brewing beer at home and where to start.
Temperature counts
You first want to take the yeast packet out of the fridge or cool storage and give it enough time to get to room temperature.

Taking it out the night before is easiest or even the morning of your brew day. Try to give it at least 4 hours to get to the proper temperature.
When to start
When you have started to boil the wort you can start to rehydrate the yeast, so some planning and timing will go into this. Usually, you’ll have enough time during hop additions to carry out the rehydration.
Make sure you have enough clean and sanitized containers for this as well.
What to use
You can use any type of container for the rehydration process such as an Erlenmeyer flask, beaker, or even a glass measuring cup.
Add water
When you put the water in the container, you don’t want to fill it to the brim, this would leave no room for the yeast, and if there is very little room you may spill it or the yeast may stick to the coverage you should be putting on it.
Add heat
You then want to bring one cup of water to the boil and then let it cool to the correct rehydration temperature of the yeast that you are using. Up to one cup of water is the average amount of water you want for a packet, but you can get away with as low as 3-4 fl oz (88-120 ml)
The proper rehydration temperature of the water will vary for different yeast strains and/or the brand. If the packet or box doesn’t have the temperature you should use on it, don’t guess, go to their website for more information or check out the rough guide in the table below.
Add the yeast
After you have reached the right temperature, you want to sprinkle the yeast into your container. Then cover the container with a sanitized top, it could just be tinfoil or even something like a plate. Then leave it untouched for up to 15 minutes.
Rehydrate
Come back to your yeast and give it a little stir with your sanitized spoon. Put the top back on and let them come to life for another 15 minutes.
Pitch your rehydrated yeast
It’s alive! The yeast is ready to pitch but remember to give your container a swirl to suspend the yeast before you pitch it into the wort.

Yeast Hydration temperatures (examples)
Ale yeasts | Lager yeast | |
|---|---|---|
Water (fl oz/ml) | 3.4/100 | 3.4/100 |
Temperature (°F/°C) | 86-95/ 30-35 | 68-77/20-25 |
Time (minutes) | 8-12 | 8-12 |
How is dried yeast made?
Yeast is a living thing and can be hard to handle and take care of if you don’t know what you are doing or if certain parameters are out of your control during the brewing process.
Brewer’s yeast and baker’s yeast are very close cousins and are generally produced commercially in the same way.
The manufacturers that make yeast have extensive supplies of the different types of yeast that they will grow. These professionals know when and under what conditions that this yeast will grow and multiply the best.
The way that these companies make “dry” yeast is actually quite interesting:
The manufacturer places the yeast cell into a small flask and feeds it lots of nutrients and water. Usually, beet or cane sugar is the source of “food”. The yeast will then be grown under specific and regulated temperatures with lots of oxygen.
When the initial flask is filled up with yeast it will get transferred to an even bigger flask where again it is fed and left to grow.
When it gets transferred to the final tank there will be thousands of gallons of liquid yeast. The reason that this is done in steps is for quality control. By scaling it up like this and not all at once, the control and efficiency of the process are increased.
While it will look as if the whole tank is made up of yeast it is only a small percentage of the liquid that is actually yeast. This is because the yeast needs space to grow.
When the yeast is active and growing happily it is ready to be used. You need to use it directly or dry it before it dies out from lack of food.
To dry the yeast you need to press it and have it dehydrated to keep that strong fermentation ability. The pressed yeast is made into thin strips or spheres.
After that, it is continuously dried by being rotated around in low humidity until the water level reaches around 7%.
At this point, the dried yeast will be packaged and sent out to us, the consumer.
Can you dry your own yeast at home?
Although you will hear most homebrewers say that this is impossible, one of the most trending yeast strains today (although not new by any means), Kveik, has been ‘hand’ dried for centuries. Despite the insistence of the community, it is possible to dry your own yeast at home under sanitary conditions.
All you really need to do is to harvest your yeast from your latest batch of beer and then add it to pre-boiled water before separating it and drying it over a number of days. By doing this you can actually harvest and dry yeast that can be used after several years sitting in your freezer.
How long can you keep dehydrated and rehydrated yeast before use?
All yeast will have a different shelf life, but dehydrated yeast in a packet can generally be stored for up to two years at room temperature. For more information on this, check out my full article on brewing yeast storage.
When it is rehydrated you want to use it as soon as it is ready, there is no set time as all yeast is different. It will be very hard to keep the temperature correct and keep the yeast alive for a long time after you have activated it.
If you have some yeast that’s been sitting in the refrigerator for a while, you may find my article on how to tell if your brewing yeast is dead helpful.
Which is better for brewing, dried yeast of liquid yeast?
Each type of yeast has its pros and cons, neither is more superior in general. It comes down to the brewers, their methods, and the recipes.
Dry Yeast- This type of yeast is highly capable of producing a wonderful beer. The shelf life varies between 2-3 years which is an advantage over liquid as well as being more tolerant of warm storage and shipping. This type also can be pitched without a yeast starter. Inversely not every type of yeast can be dried, so you have fewer options.
Liquid Yeast- The big benefit here is that any strain can be cultured but since it is alive the viability will decrease as time goes on. It is also much more temperature-sensitive and more expensive.

Liquid yeast usually has a life of about 3 months, longer if cared for properly and much shorter if not. For instance, all the yeast cells could die if they are exposed to temperatures much above normal pitching temperature.
Can you use dried yeast in a yeast starter?
When it comes to a yeast starter, liquid yeast is most commonly used. You first add the liquid yeast to a water or starter wort mix before pitching it a day or so later to your main batch.
Once pitched to the wort in the fermenter, the yeast starter helps to increase the population of yeast and hopefully prevents poor fermentation.
How long does it take dried or liquid yeast to start fermenting?
Both liquid and dried yeast should start to ferment in between 12 and 36 hours but could take longer so don’t worry if it doesn’t start straight away.
You have to remember that before the yeast starts turning your wort into beer it has to go through respiration and the lag phase lasts between 4-8 hours. If after 36 hours there is no sign of fermentation, take a gravity reading. These are the main things that will affect the fermentation process.
- Temperature
- Amount Of Yeast
- Type Of Yeast
- Water PH/Minerals
- Oxygen Levels:
How much-dried yeast/ liquid yeast do you need for a 5-gallon batch of beer?
Usually, you use one packet for every 5-gallon bucket of beer but it varies on the type of yeast and beer that you are making. Remember that having too little yeast and too much yeast can lead to a beer full of unwanted off-flavors.
Need yeast? Why not check out my recommended online stores: