
When you start brewing beer you are instantly bombarded with numerous terms such as sparging which aren’t that self-explanatory.
Also, it has to be said that amongst the wider brewing community, many veteran brewers can be less than sympathetic to any greenhorns finding their way. Well, if you’ve ever wondered what sparging is all about and why brewers carry it out, this is the place for you.
So, what is sparging and why do we do it in beer brewing?
Sparging is a process which is used in the ‘All-grain’ brewing method for making beer. Once the grains have been mashed, warm water (below 170°F) is poured over the grain bed in order to extract as much fermentable sugar as possible into the final wort. This process is often repeated several times.
So there you have it, that’s what sparging means. However, stick around for a more in-depth look at exactly why we do it as home brewers and how you can improve the efficiency of your sparging process.
What is the purpose of sparging?
Firstly, it would a good idea for me to explain that sparging is one of the three steps in a process called Lautering. Basically what we are trying to do is to separate our fermentable-sugar-giving -grain from the wort (pre-fermented beer) which we will soon be boiling with hops.
The reason why we sparge our wort is so that we can be sure that it has as much of the fermentable material we need in it to make a quality beer. If you simply drain off your wort from your spent grain, then you may risk leaving behind much of the fermentable sugar you have just spent the last hour extracting during your mash.
This may mean that you never achieve the target final gravity of your beer as your yeast will simply not have enough nutrients to work with during the fermentation stage. So, sparging can really make or break a beer!
Is sparging always necessary?
No, if you are brewing beer in a certain way then you will not have to sparge your wort at all. By this I mean, if you have bought an extract kit from a local brew shop or online. With an extract kit, the mashing and lautering processes (including sparging) have already been done for you. So, if you aren’t dealing with raw grain during the recipe you are following, then sparging isn’t necessary in your case.

When should I start sparging?
In terms of your career as a brewer, sparging is an essential stage in any all-grain recipe, so as soon as you migrate to these types of brew days you need to start sparging.

In more literal terms, the sparge takes place after the mashing process has ended and before you boil up your wort in the boil kettle. However, it’s important to mashout your wort before you attempt to sparge it. This just means raising the temperature of your newly mashed wort to about 170°F/76°C. You do this to put a stop to the work of the enzymes in the grain and maintain the level of sugars which have already been released in the mashing process.
Once you have completed the mashout (when necessary), you are ready to begin sparging your wort and making sure that you get the most out of the grain bed that you can in terms of fermentable material.
What is the difference between No sparge, batch sparging and fly sparging?
Thankfully, brewing techniques have been developed over many thousands of years and seem to get better and better. The same is true of the sparging process and different methods can be used to get differing results. There are 3 main methods to be aware of, but you may only use one during your career as a brewer.
English/ No sparge method:
This is a method which you need to plan ahead for and isn’t just a mistake some poor Englishman made one day. In fact, what you are aiming to do with the no sparge method is to produce enough wort for your boil from a single drain of the mash tun.
So, the entire body of the sparge water needed is added to the mash tun, mixed with the grain and then drained through the grain bed in one go. In order to ensure that enough fermentable sugar can be extracted in one fell swoop, about 20-25% extra grain is added to the grain bill. This method can give you a much richer and smoother-tasting final beer than one made with the same recipe and another sparging technique.
Batch sparging
This method is perhaps a step beyond the ‘no sparge’ method in terms of evolution as it involves additional drainage.
Basically, what is done in batch sparging is to drain the wort from your mash tun through the grain bed, then to add additional sparge water, mix it gently into the grain to suspend any sugars left then to drain the mash tun again. You can repeat this step another 2 or three times.
In days of yore, this method was used to create beer of differing strength. Not to bore you with the history of it, but suffice to say that in much of Europe alcohol was the only safe thing to drink and you wouldn’t want to drink a 10% ABV beer all day long. However, nowadays most brewers simply combine their first, second and even third batch from sparging to reach their boil quantity.
Fly/continuous Sparging
By far, this is the most popular and common method of sparging your grain amongst the wider brewing community. Although it is very time consuming and requires some additional equipment, it can be very efficient in extracting fermentable sugar from your mashed grains.
In this method, the entirety of the water used for sparging is slowly sprinkled into the wort and through the grain bed. This is done through a device called a sparge arm. The sparge arm simply allows for a more even flow of water over the grain and won’t allow it to collect or form ‘rivers’ which would leave much of the grain unrinsed.

The key goal is to allow the same amount of water to enter the sparge arm and into the container as the amount of wort which is being drained into the boil kettle. All in all this process can take anywhere between 45-90 minutes depending on the quantity of the wort being used.
Fly sparging only really gives you one shot at extracting the right amount of sugars into your pre-boil wort, so you really need to supervise the situation. Never get impatient and allow the spigot on the mash tun to be fully open, this can lead to a much lower gravity wort. In order to achieve the correct target gravity, later on, make sure that you monitor your wort and shut off the sparge when you hit about 1.010 SG. This way you won’t infuse your lovely wort with terrible tannins and grain floaties.
How long do you Sparge for?
There are several different ways to actually carry out the sparging process and so it really depends on how you are doing it. However, the main goal is to collect enough wort for the boiling process and/or to obtain your target original gravity for your wort according to your recipe.
The exact duration of the sparge depends on the method you are using, of which the most famous and widely used are the English (no sparge) method, fly/continuous method, batch method.
So how long does it take using each sparging method?
The English (No sparge method): Around 10 minutes to add additional water and drain off.
Fly/continuous method: Average 45 -60 minutes (up to 90 minutes)- You can sparge for longer for better sugar yields
Batch method: around 3-4 minutes per batch drain off.
How hot should my sparge water be?
Water is water, right? It shouldn’t matter how hot it is as long as it rinses the grain, correct? No, and no! Getting the right water temperature when sparging is crucial.
Although we all entered this wonderful hobby to make beer, we didn’t realize until we were in the throws of it that brewing beer is more like a science project. So, little things like temperature and quantities really can have a huge effect on your finished beer.
So, as a general rule, you should aim to heat your sparge water to about 168-170 °F (76-77°C). If you have performed a mashout then your wort should have already hit this temperature.

Why do you need it to be so hot? It’s simply because the sugars we are trying to extract will be more viscous at this temperature and should flow more easily out of your mash tun with the wort. Also, you can be sure that the enzymes that we rely on to break down the starch in the grain to produce sugar will be less active at 170ish °F. If this wasn’t enough, you will also reduce the amount of tannins which will be released into your wort by maintaining correct sparge water temperature.
Can you Sparge with cold water?
As always the answer is, it depends on what we mean by ‘cold’. If you were to chill water and try to sparge with it then I really can find no evidence to suggest that the process would be very effective. However, if you were using regular temperature tap water (54°F/12°C) then you may be able to extract enough fermentable sugar to make your beer a success.
There is a case study where the brewer claimed to do this successfully (source), but I would just suggest sticking to using heated sparge water at around 170°F (77°C).
Even when you are attempting to fly sparge, then you need to maintain the temperature of your sparge water throughout the process. It is less of a concern, in my option, if the wort which is already drained from the mash tun loses some heat, but I would definitely want to keep my sparge water within the 168-170°F range as far as possible. It’s something which you will get better at as a brewer and how effectively you can do this will depend on the equipment you have available. See below for my suggestions.
What equipment do I need for sparging?
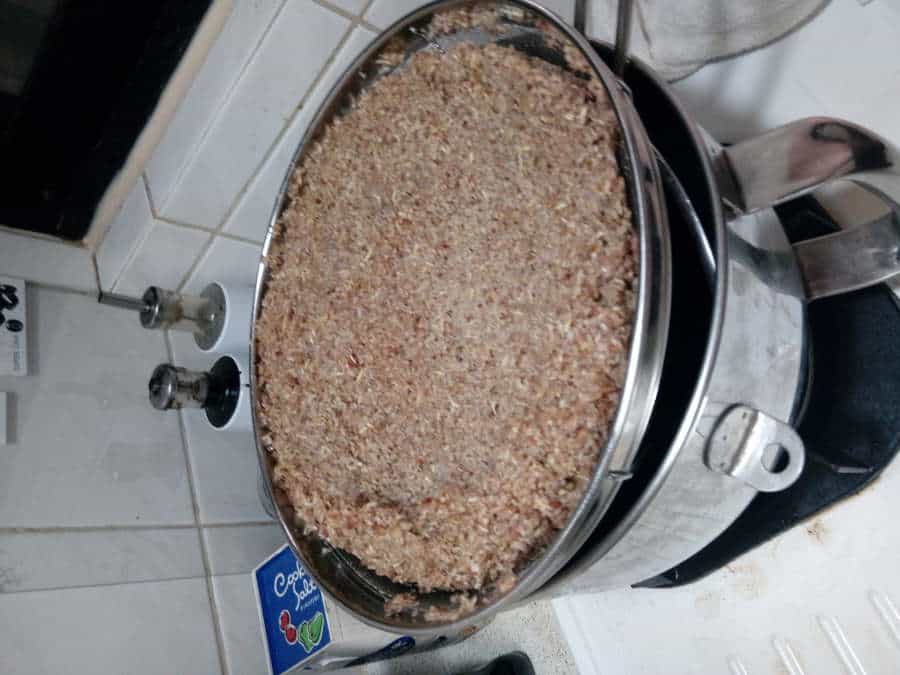
There are many fancy ways to sparge your wort, but the basic method will involve two or three large pots and some sort of strainer or sieve. You then need to strain your mashed grains from your ‘mash tun’ pot into the second pot. The grain will collect in the strainer, you then need to pour warm water over the grain in order to extract as much fermentable sugar from the grain bed as you can. Honestly, just using pots and strainers is incredibly fiddly and you can easily lose a lot of wort through spillage and risk burning yourself on the fairly hot liquid.
A far better option is to invest a little money into a dedicated Mash-tun with a false bottom and/or spigot tap so that you can easily extract the wort and add water onto the top of the grain bed (collected by the false bottom) without having to manually lift pots and handle strainers full of grain. Although I’m sure that you are strong, 6 gallons of water is heavy as is the amount of grain you use in an average brew for a 5-gallon yield of beer.
When it comes to sparging, you can also go one step further, depending on the method you use, and invest in a sparge arm. This basically distributes water or the grain more evenly and effectively than pouring by hand. These things are also fairly easy to build at home if you have a tool shed and some time on your hands
My recommendation for your homebrew sparging set up:
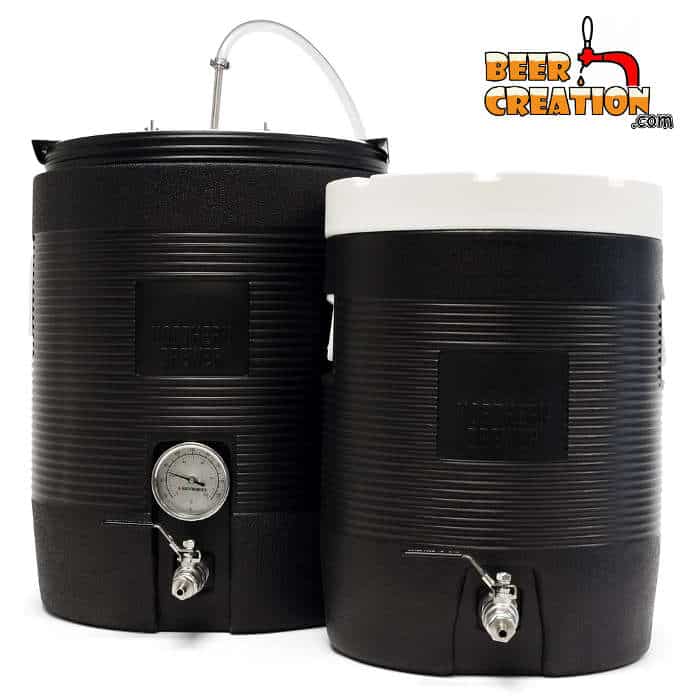
1 x Northern Brewer Mash Tun & Lautering Kit
Although you can probably source all the materials you need for a good sparging set up from elsewhere and maybe even save some money doing it, I have asked around and confirmed that this is the best all in one kit. Prices change as does availability, but the best place to get this full set up is currently Amazon. So check it out for yourself.
Northern Brewer has put together everything you need here and it’s great for brewers who don’t have a lot of space to play with too. I personally live in an apartment, so this is a really great option for me especially.
Never the less, you can get away with using two fairly ordinary pots, you’ll need about 10 gallons plus capacity in each, a plastic hose or tube and a sparge arm purchased online or made from some food-grade plastic tubing. If you are considering buying a sparge arm, then look into the Imperial Sparge Stainless Steel Arm on Amazon. It’s what is included in the Northern Brewer set up I mentioned above and gives you the ability to change the width depending on your kettle size. So it will grow with you as your set up grows too.
How much water do I need for sparging?
This piece of vital information is often missing on most all-grain recipes which can be infuriating for someone starting their first attempt. So, just remember as a general rule you need 1.5 times the amount of water for sparging as you do for your mashing process.
The amount of water depends on your grain bill as well as the expected evaporation during each stage of the brew. All in all, you need enough sparge water to adequately rinse the grain and end up with enough wort for the boil, eventually giving you enough wort for fermentation.
To calculate this you can get yourself an app or use an online brewing calculator so that you can make sure that you hit your numbers every time.
Over-sparging
As with anything else in life when it comes to sparging, too much can be a bad thing. One of the major drawbacks of being overly greedy in your quest to extract usable sugars into your wort is that you may actually collect something rather nasty.
Astringency in your beer will give is it an unpleasant vinegary taste which is a result of too much tannin in your beer. This is caused mainly in the sparging process where the Ph of your wort (or grains in this case) is being driven up while the specific gravity of your beer is being reduced. This is the ideal situation for tannins to leach into your wort and give you an unwanted surprise later.
The solution to this issue of over-sparging is simply to remain vigilant and to take readings of your wort’s specific gravity with a refractometer or hydrometer. (check out my full article on how to use these instruments and read your specific gravity) Once the specific gravity reaches about 1.010 you should stop sparging, even if you haven’t hit your boil quantity of wort.
Related Questions:
What is the difference between extract brewing and all-grain?
The biggest difference is with the ingredients which you use on your brew day. (shop for your brewing ingredients on homebrewing.org). An all-grain recipe requires the brewer to mash the grains (convert starch into sugar) and then lautering the wort created (rinse it and separate grains from the liquid wort) before starting the boiling stage.
With an extract recipe, these steps have already be done for you by the manufacturer of the kit and recipe you are following. This means that for an extract kit or recipe, sparging isn’t a necessary stage in your brew day.