
I’m a self-confessed homebrew bottler, simply because of the way I like to share beer with friends. This being said, bottling beer can take time and cleaning the bottles themselves is a huge part of it.
As I bottle almost all of the beer I make, I’ve developed quite a knack to how to clean bottles much more quickly. So, how do you increase the efficiency of your bottle cleaning process for homebrewing?
In order to increase the speed at which you clean bottles for homebrewing you should avoid cleaning products you need to rinse, using recycled/dirty bottles, and using cleaning utensils that don’t reach every part of the bottle. The temperature of the water is also vital as is having a good method.
In addition to that fairly clear cut answer, I’d like to share with you a few more tips and ideas which may make cleaning beer bottles that much faster for you.
Why clean beer bottles at all?
As it’s so time-consuming, you may even be question why you have to clean AND sanitize your bottles.
Why not just kill off the nasty bugs and microbes and get straight to the bottling process? If you are even brewing the same beer recipe, why do you need to clean out the same beer that was in it from last time?
OK, I’m being overly-dramatic here, but cleaning your bottles, as with everything else in homebrewing is absolutely vital and if you were to skip this step you could very likely ruin your beer in the long run.
It’s important to remove any trace of organic material from your beer bottles, usual the leftover yeast from bottle conditioning before you try to sanitize the bottles. More on this a little later.
Best cleaners for homebrewing
Choosing the right cleaner or cleaning product will help you clean your bottle more quickly. However, you shouldn’t be using any old product you can find around the house.
Don’t use washing up detergent
There are several reasons not to use normal washing up detergent when cleaning bottles for homebrewing. It’s not that this product is bad for you or necessarily bad for homebrewing, it’s just that using it will slow you down.

The major issue is that using even a little bit of washing up detergent will lead to a lot of residue being left on the inside of your bottles. This can lead to foaming when you come to use the bottles later and could also affect the head retention of your beer.
Another issue is that most washing up detergents have an aroma of some sort. It is highly possible that this aroma could transmit into your beer unless you rinse the bottles thoroughly.
Which brings me to the main reason you don’t want to use washing-up detergent, you’ll always have to rinse each bottle at least once or twice, and this is a time-consuming activity. So it’s best to cut out any unnecessary rinsing by choosing a better cleaning product.
The best cleaning products to use
One Step – Logic

If you are looking for a efficient product in terms of cleaning power and cutting down on cleaning time, I really cannot recommend One Step Cleanser by Logic inc more.It’s a really good cleaner in fact, and not only for getting dirt off but also beer bottle labels.
Overall the reason why I would recommend One Step over something like PBW is that it is a no-rinse cleaner. Whereas bottles cleaned with PBW definitely need to be thoroughly rinsed, you don’t need to rinse after using One Step. That’s going to save you at least 20 -30 minutes if you did it all by hand.
One Step Use :
One Step (tbs) | One Step (fl oz) | Water (gallon) | Water (liters) | Exposure time |
|---|---|---|---|---|
1 | 0.5 | 1 | 3.78 | 60 seconds |
2 | 1 | 2 | 7.57 | 60 seconds |
3 | 1.5 | 3 | 11.35 | 60 seconds |
4 | 2 | 4 | 15.14 | 60 seconds |
5 | 2.5 | 5 | 18.92 | 60 seconds |
Cleaning tools
Now, from my many days of cleaning bottles, assuming that you are going to be working with recycled beer bottles, I know that having the right cleaning tool is a must.

All you really need is a decent bottle brush, anything else just isn’t going to give you efficient cleaning. However, you need to make sure that the bottle brush you get meets certain criteria:
- wide bristles
- no flat head surface
- not loose
- long handle
Total contact
Just make sure that the brush has bristles that are wide enough to touch the entire internal circumference of the bottle as you clean. I’ve had some bottle brushes that were too narrow and it just takes that extra little bit of time every bottle to clean off all the organic residue from the last beer.
Bristles all over
Try to buy a bottle brush which has bristles that stick up from the top of the brush too. Often Bottle brushes will just have the bristles at a 90° angle to the twisted wire core, I find that this doesn’t clean the bottom of the bottle as well as brushes with bristles on the end of the brush as well.

Loose brush bristles
A couple of cheaper brushes that I got as part of a kit or I bought before I knew better literally shed their bristles. As they are held in just with simple twisted wire, they quickly came loose.
This is going to add time to your cleaning process because you need to make sure all those bristles are flushed out of the bottles otherwise someone may swallow them later, and I don’t think that’s too healthy.
A long reach
Another thing which will just speed up the efficiency is a bottle brush with along enough reach. If the handle is too short you’ll be bashing your fingers on the bottle’s mouth every time which will just slow you down, so get a handle which is at least 13-15 inches (33- 38 cm) and certainly no shorter than the average bottle height of 9-10 inches (22-25 cm)
I can recommend this brush set which you can find on Amazon.
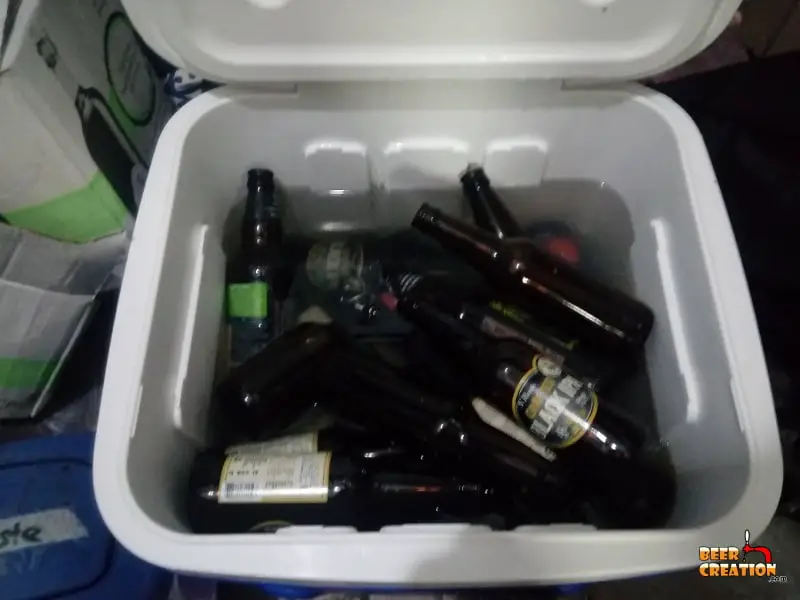
To recycle or not recycle bottles
In almost all cases I would say you should be using recycled beer bottles, except when it comes to speed.
Personally I always use recycled beer bottles, either from previous batches or just from commercial beers I occasionally drink. (buy beer from local breweries). I’m known among my running club to be someone who will chase after you for your empties which I take home by the crate.
However, actually cleaning used bottles, especially if you forget to do it the same night you drank from them can be another time-consuming element of cleaning beer bottles.

So, for this reason, only, you may want to think about buying unused beer bottles, such as this North Mountain Supply pack of 24 (You can pick them up on Amazon) or something similar from your local homebrewing store.
Another great thing about buying unused bottles is that you don’t even need to clean them, a quick rinse (just for precaution sake) and you can go straight onto sanitizing them ready for bottling.
Removing labels more quickly
Again, if you aren’t going to use unused beer bottles, removing beer labels is just one more task which can take a lot of time.

Although One Step does actually work fine for removing beer labels too, I recommend using an oxygen-based cleaner, something like Oxiclean.
I’ve found that if you fill up a large container like a beer cooler, a bath or even a sink with really hot water and a few cups of oxiclean, it can help remove labels very quickly.
I usually let the bottles soak for about 20-30 minutes, making sure they are all completely submerged. Then while the water is still quite warm, I take an aluminum-wool scraper and start scrubbing. To be honest, most of the labels will just fall off, but you get some beer companies who use stronger glue than others.
If you want to find out about 10 other easy ways to remove beer bottle labels, check out my article.
The quickest way to clean bottles
For me, the quickest way to clean bottles is to have a good method which makes the process more efficient. Here is a step by step guide to my current system, but be aware I don’t currently have a dishwasher which could speed up the process a little bit.
What you’ll need:
- 2-3 large containers (beer coolers or big buckets)
- a bottle brush
- an aluminium-wool scraper
- Oxiclean
- One Step cleanser
- a plastic packing crate
- paper towels
Step 1:
Fill up a large container with hot water and 1-2 cups of OxiClean.
Step 2:
Place the dirty bottles (with labels too) into the container and make sure they are submerged. Leave them to soak for 20-30 minutes.
Step 3:
While the bottles are soaking, fill up the second large container with One Step cleaner and hot water.
Step 4:
After soaking the beer bottles, scrape off any remaining labels and transfer them to the second container making sure all paper has been removed and the bottles are submerged.
Step 4:
Take the bottle brush and scrub the inside of the bottle a couple of times and drain the liquid out. Look inside the bottle making sure there is no organic material stuck on the side. If there is, fill the bottle again with warm water and One Step and leave it to soak for 5 minutes or so.
Step 5:
As you clean the bottles, place them in a plastic container and cover them with paper towel, especially if you have pets around or are doing this outside!
Step 6:
Now that the bottles are clean, you can sanitize them using Star San or in a dishwasher if you have one.
Tips to decrease the time it takes to clean beer bottles
As I have done this a lot, I know that there are certain things you can do to cut down the amount of time it takes to clean bottles even before you get to the cleaning stage.
Tips for faster cleaning:
- When you finish drinking a beer, rinse the bottle out thoroughly – it’s easier to get yeast and other compounds out when they are still ‘wet’ and not dried on.
- Use bigger bottles – this means you have to clean fewer bottles than if you use smaller ones.
- Make sure the bottles fit your bottle caps, or vice versa – don’t spend time recycling and cleaning bottles which you won’t be able to cap later. Always test new bottles before you bother to clean them.
- Clean to music – maybe it’s just me but cleaning with music just gets me motivated, but each to their own!
Do I need to Dry bottles
Personally I never wait for my bottles to dry. If you are using the no-rinse cleaner, One Step, I usually just give them a good shake out, then place them in a box or on the counter and cover them with a paper towel (keep that brew dog’s fur out!) ready for sanitizing. I do the same after sanitizing them.
You could, in theory allow your bottles to dry between cleaning and sanitizing, but I definitely wouldn’t advise doing this after sanitizing, assuming you are using a no-rinse sanitizer.
Which types of bottles to use?
As I said, if you really want to save time, get something like North Mountain Supply pack of 24 bottles (just make sure you get about 3 packs, which will give you plenty of spares) as you won’t even have to ‘clean’ them.
However, if you are going to be recycling bottles and cleaning them before reusing them, the best time savers are bigger bottles.
On average, you’re going to brew a 5-gallon batch every time you brew beer. That’s the same as 640 fluid ounces, which would be roughly fifty-four 12 fl oz beer bottles. Assuming your dosage is perfect, that’s only 54 bottles you need to clean, but most brewers will need to prepare an extra 2-10 bottles for breakages or unfilled bottles.
If on the other hand, you worked with larger vessels, say 22fl oz bottles, that’s only 30 or so bottles without the reserve. So, whenever possible I try to bottle in larger bottles to cut down the times spent cleaning, sanitizing, AND bottling the beer.
Do this to avoid off-flavors when bottle conditioning
Although you may kill off a lot of the bacteria when you sanitize your beer bottles, cleaning them well is also very important.

It’s vital that you thoroughly clean and check each bottle for any left over organic residue on the inside of the bottle. It’s quite possible that even a small amount of ‘old beer’ in the bottle will react to the bottle conditioning process and add a flavor you don’t want in your beer.
To avoid this happening, make sure you hold each bottle up to the light so that you can get a good look inside and check that it’s crystal clean.
Why bottle beer over kegging?
After reading this you may just think, why go to all that extra effort of cleaning and bottling your beer when kegging is so much quicker.
There are two main reasons I can think of to bottle beer over kegging:
Easier to share
90% of the beer I make I give away to friends. Every Sunday I got to a trail running club and we drink beer after the run. Often we’re drinking my latest beer creation, and it’s far easier to transport bottles of beer than to pack up all the kegging equipment and drag it up a mountain.
Bottle conditioning
Another reason to bottle condition your beer is because of the beer style itself. By far my favorite type of beer as a very broad group is Belgian ale. After living there for 3 years, I’m hooked on all types of Belgian beer.
Most of the better Belgian beers you know are bottle conditioned because that aging process gives them their distinct style, something which couldn’t be replicated in a keg.
Methods for sanitizing bottles
Once you have cleaned your bottles, you have to sanitize them of course. So let’s brieftly talk about sanitizing bottles.
So, here you aren’t removing organic material as such but rather removing organic micro-organisms that could ruin your beer later. The best ways to do this is a) use a no-rinse sanitizer like Star San or b) use a dishwasher.
If you are worried that using Star San will affect the taste of your beer, please read my article where I did some research into this topic.
If you are using a dishwasher, just be aware that although this is a good way to sanitize bottles with hot water, it’s not an effective way to clean bottles, so you should still clean them by hand.