
When you get into homebrewing the first horror story you hear is that you MUST cool your wort down fast after the boil.
Normally on day one, you are dealing with a kit you got for your birthday or something and you don’t have any fancy kit yet. So, naturally, your mind turns to the coldest thing in your home, ice!
So, can you really use ice to cool down your wort by placing it in the liquid itself?
Cooling your wort down with ice is possible as long as it’s free of contaminants. Using ice packs should be avoided. To calculate how much you need it’s necessary to know the mass & temperature of your wort & the ice you will be using. Ice can also be used in conjunction with/without a wort chiller.
You may think that the issue is cut and dry, pardon the pun, but there is a lot more to using ice to cool wort than what I’ve just mentioned.
Luckily I’ve compiled all my research into this topic below so that you can make the best choice and ensure a perfect pint down the road!
Ways to cool wort with ice
There are three main ways in which you can use ice in the cooling process on brew day. Each one has its own benefits and drawbacks.
Ice in the wort
When you searched for this answer you were probably wondering if you can put ice directly into your wort and thus cool it down that way.
It’s certainly an option but you will need to prepare the ice beforehand to avoid any adverse effects and you will also have to calculate for this addition. Simply adding ice at random will cause you a lot of headaches down the road.
I’ll go into a lot more detail about this later on in this article.

Ice bath
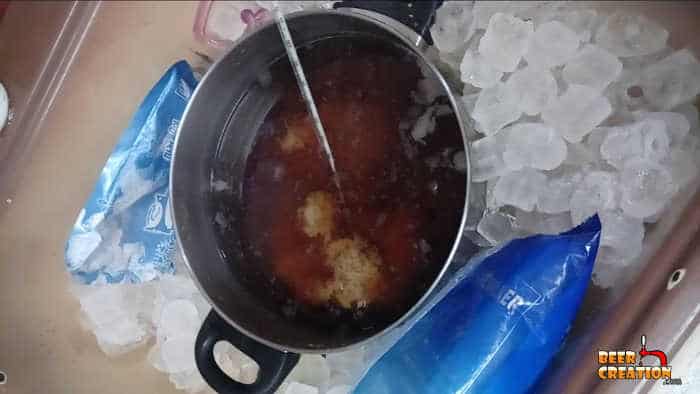
Another way, or additional way, to use ice to cool your wort is to place your brew kettle into a bath of ice in your kitchen sink or, funnily enough, a bath.
This is a tried and tested method and is ideal for any brewer who hasn’t yet invested in a wort chiller. ( see my article on the right type of wort chiller for your set up here).
Although a good method of cooling your wort down, it is still a lot slower than using a wort chiller and thus gives you an extended danger period when your wort could be contaminated by something nasty in the air.
Ice-cooled cooling system
A really eco-friendly way to use ice, in partnership with a wort chiller, is to build your own closed cooling system. What I mean is using two wort chillers, if using immersion models, or a single counterflow or plate chiller which is fed from an ice-cold water reservoir.
For this, to work, you need a conventional aquarium pump and a beer cooler to hold your ice water. This will not only help you to cool down your wort a heck of a lot faster, but it’s also going to slash your water usage right down.
I’ve gone into a lot of detail in my article about the best pumps for this system and exactly how to set it up, you can read about it here.
New to homebrewing? Please feel free to read my ultimate guide to brewing beer at home and where to start.
Dangers of using ice in the wort
I always think of brewing beer as an excellent reflection on life, what I mean is that every small thing you do on brew day can have a significant knock-on effect in your finished beer.
Contaminated ice
The biggest danger is that the ice you use isn’t 100% pure or clean. If you froze contaminated water it would simply introduce those dirty particles into your wort. This would more than likely lead to an infected beer in the 24-48 hours it takes yeast to ‘activate’ after pitching.
Of course, this is the worst-case scenario for any brewer and it can be heartbreaking to see all that hard work go literally down the drain because of a small oversight.

What ice can you trust?
Well, pretty much only the ice that you make yourself, and then only if you know what you are doing. As John Palmer says in his excellent guide to brewing ‘how to brew‘, never use commercially produced ice. It may good enough for your coke on a hot afternoon, but not for your homebrew.
You should only add ice which has been made from distilled water and made in sanitized containers. You cannot be too careful here, so make sure you aren’t in a rush and are forced to use ice from an untrustworthy source.
Diluting the wort
By adding additional liquid to your wort you are going to dilute it and thus affect the specific gravity. As you probably know, the SG (often referred to as Original Gravity and Final Gravity in brewing) is used to calculate the ABV % of your finished beer, among other things.
If you were using a recipe which called for you to boil the full yield of wort, with boil-off calculated of course, then adding ice would really affect the final numbers.
So, with this in mind, adding ice that would melt and cool your wort would throw your numbers off and lead to a very different beer to what you were expecting. Even if the difference was minimal it would be something you want to avoid.
However, for most new brewers following a kit recipe you rarely boil up the full yield and are always required to add additional water later before pitching your wort. So, in these cases adding a couple of pounds of clean ice wouldn’t be a huge issue.
Energy usage
Of course in an ecological way, we can’t forget that producing a large amount of ice in your home freezer isn’t going to require a lot of energy. So this isn’t so much a danger for your beer than it is for the entire planet.
Unfortunately, brewing beer isn’t the most ecologically sound hobby but it isn’t the worst. It’s something to think about at any rate.
Benefits of using ice
There are two sides to every coin, so if you can be sure to use clean ice and only use it when you won’t be diluting your beer what can be the advantages?
Saves water
Purely using ice, in theory, can drastically reduce the amount of water you would use if cooling with a conventional wort chiller.

Assuming that you aren’t using a closed cooling system with a feed from a bucket, you could be using anywhere from 1 to 10 gallons of water per minute to cool your wort down. That’s just crazy!
If you could use less water, but in solid-state, to achieve the same task then this would be great not only for your water bills but also for the environment. However, there are some numbers to take into consideration, which I’ll go over a little later in this article.
Reaching pitching temperature
Another way in which using ice can help you save time and money is by using it in tandem with a wort chiller.
Most brewers will hook their wort chiller up to the main water supply in their house which will be served at the current ground temperature. In warmer climates, this could be 10-20 °F above the desired pitching temperature.
This means that try as you might, you will never bring your wort below the temperature of the cooling water you are running through your wort chiller.
However, you can use ice to help you bring it down those last couple of degrees. This can be done either by adding clean ice to the wort itself, placing the brew kettle in an ice bath or running your wort chiller through the ice.
This can be done either by using a second wort chiller sitting in a bucket of ice in a series or by running ice-cooled water through the wort chiller.
How long will it take to chill wort with ice?
Of course, this depends on how much wort you need to cool and how much ice you use. Because you are not using heat exchange in quite the same way as a wort chiller does, which removes the heat rather than dissipates it, it will take slightly longer.
As a general rule of thumb, using only ice to cool your wort will take somewhere in the region of 10-25 minutes.
How does it work exactly?
This is where we get a little scientific, but not too much otherwise my brain will start to hurt.
The important thing to remember here is that liquid will take a specific amount of energy to raise or lower its temperature, expressed in calories.
Water has a specific gravity of 1 and its mass can be calculated based on this reading (takes me back to the days I sat my pilot’s exams!!). 1 liter of water is equal to 1 kilogram (0.264 gallons / 2.2 lbs). Your wort will be a little bit different due to its SG, but we can stick with water for the moment.
As a container of water loses one degree Celsius (33.8 °F) it will take 1 calorie of energy to do it. However, that temperature isn’t really lost, it is absorbed by the cooler water and the overall temperature of the mass of liquid is reduced.
How much ice do I need to cool down my wort?
To calculate how much ice you need to cool your wort down you need to know the mass of your wort and the mass of your ice.
When you know this you can calculate exactly how much ice you need to bring your wort down from one temperature to another.
If you are really keen to find this out, I have found this helpful video below which explains the basic principle.
Alternatives to chilling wort?
For some of us using ice just isn’t the best option to cool our wort down. It could be down to logistical reasons or even your personal principles. So, what are the best alternatives to using ice (or a wort chiller)?
Cooling your wort overnight
Recently I’ve taken to cooling my wort overnight, which sounds exactly the way that you do it. Straight after the boil, I pour my wort into a fermenter and then allow it to cool naturally down to room temperature. Although you don’t get that perfect cold break, I’m not so concerned about a clear looking beer.
Obviously this is only possible if you are living somewhere where the room temperature is the optimal pitching temperature. I personally can’t do this in summer without putting the fermenter in a cooler and placing ice packs around it.
Another thing to bear in mind is that some plastic fermenters may not be designed for hot liquid, and this can lead to chemicals leaching into your wort. So, a glass fermenter or carboy is recommended, something like the glass version of Northern Brewer’s Big Mouth Bubbler (6.5 gallons) which you can find on Amazon.

If you want to learn about Cooling your wort overnight then please check out my full article on this topic.
Cooling your top-up water
Another step I’ve been taking recently is to cool a couple of gallons of water in the refrigerator, but you could also chill them right down in a freezer if you had the room.
I personally pour this chilled water into my fermenter and cool it overnight, but you could combine this method with a wort chiller or an ice bath to get the temperature of your wort down to pitching temperature on brew day.
Using ice packs to chill wort
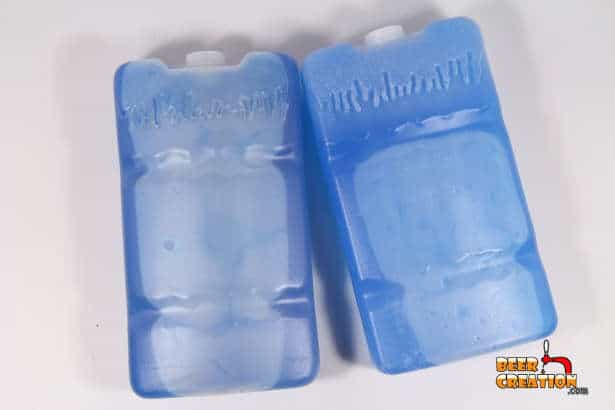
Ice packs are a great idea when it comes to ice baths or, as I use them, in a cooler while fermenting in summer. However, I would be extremely cautious about using most brands of ice packs directly in your wort.
Even if the ice pack itself was totally sanitized, most models aren’t intended to be used at very hot temperatures. For the plastic block type, they may actually leak chemicals into your wort which can be harmful over long periods of time.
For the ‘pocket’ type ice packs there is a danger that they could actually burst and leak the internal liquid inside them into your beer. I certainly wouldn’t drink that batch if it happened to you!
Cooling wort with snow
Although I wouldn’t recommend you put snow into your wort directly unless you were brewing on the very top of a mountain where you were sure the water particles weren’t at all contaminated (not very likely!), it can work for an ice bath.
Snow is actually an insulator, but if you were to ‘circulate’ snow around the brew kettle rather than burying it in the snow then you would get good cooling effects.
Don’t want to bother with ice now?
If you have decided that ice in any form isn’t the best way for you to proceed, then I really recommend that you invest in a good wort chiller. Although in winter I favor the ‘no chill’ method, I always resort to a wort chiller in summer months.
Here are my top picks:
Immersion chiller
Northern Brewer Silver Serpent

I really like this design as it avoids any chance of water dripping into your wort because of the shaped input/output arms. It’s also plenty long enough to give you efficient cooling.
Check out the latest prices and deals on Amazon.
Counterflow chiller
NY Brew Supply Deluxe

I would say that this is an excellent ‘entry-level’ counterflow wort chiller. It’s inexpensive and durable not to mention easy to set up.
Check out the latest prices and deals on Amazon.
Plate chiller
HFS(R) Homebrew Beer Wort Chiller

Although perhaps less expensive than a counterflow chiller, plate chillers are harder to clean. However, of all the ones on the market, this is the best deal and it’s going to reduce your chill down to a matter of minutes.
Check out the latest prices and deals on Amazon.