
If you watch my YouTube channel, you’ll notice that I’m very different from most homebrewers out there as I brew in a small apartment. So, you can stop reading because you’ve got your answer, right? Well, maybe not quite.
So, can you brew beer in a small apartment? There is nothing to stop a brewer from making beer in an apartment but there will be some limitations. Space is the most important concern as it determines recipe type, yield size, carbonation method as well as storage. If the brewer is resourceful & flexible, brewing in an apartment is possible.
So, if you would like to find out just what the limitation will be on any brewery set up in an apartment, then carry on reading as I’ve put all my knowledge and experience into the following article.
Getting started (Apartment Brewing)
Space is obviously the biggest issue for anyone who is planning to brew in an apartment, so let’s just break that down into the key stages of the brewing process.
Although it may seem to the contrary when you watch brewing videos or read about it online, you don’t actually need that much equipment or space to brew beer. If you are organized and choose the correct methods, you can actually do a lot with quite a little amount of room.
Firstly, let’s talk about how to approach this as a complete beginner and talk about the type of beer recipe or kit you should be brewing. There are two avenues to go down, the first is extract-based recipes and kits the other is all-grain.
Extract or All-grain for apartment brewing?
Although you can certainly do both, my first every brewing experience was with an all-grain recipe in an apartment, the extract-based kits or recipes will be much easier. This is because an extract kit or recipe removes several of the stages in the brewing process which requires additional equipment, namely mashing and lautering.
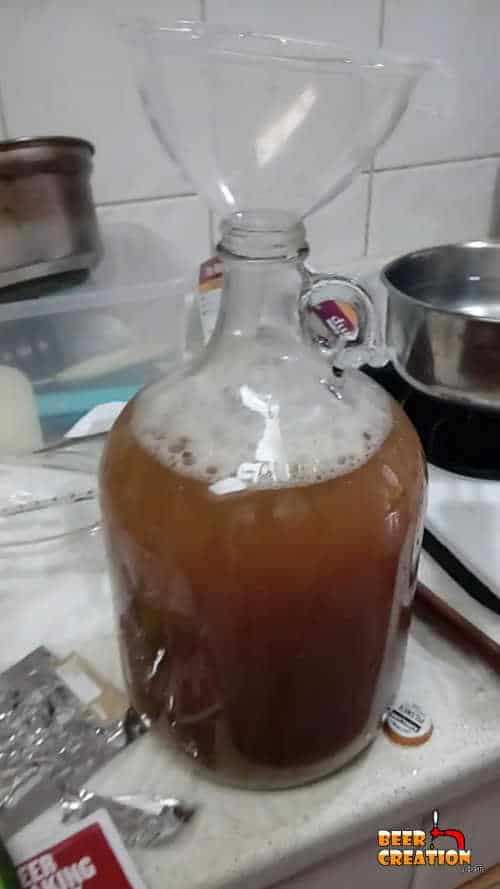
With an extract-based brew day you only really need one large pot for boiling your wort, and a carboy or another type of fermenting vessel to ferment the beer in. That’s about it really. As I said before, all-grain brewing requires some additional pieces of kit particularly a mash tun and lautering tun (which can be the same vessel) plus a hot liquor tank.
This being said, you can still go down the BIAB route which combines the mashing and boiling phase into the same pot by using a brewer’s bag to help you easily lift out the mashed grains leaving behind sugary wort ready for the boil.

Space on Brew Day
So, if we assume that you are going to start off with an extract-based kit where you are using either liquid malt extract (LME) or dry malt extract (DME), how much room do you really need for your brew day?

Well, I work with a kitchen where I only have about 11.62 ft2/ 1.08 m2 including the sink and the stovetop. Of course, this is very tight and I have to not only boil my wort but also clean and sanitize my equipment as well as rack my wort into the fermenter. But using the right tools, such as an auto-siphon, really helps with this last process.
In general, getting yourself organized is key and knowing exactly what you need to do next will help you navigate around your small brewery without too much mishap. I really recommend that you read the instructions for your kit or your recipe several times before you start brewing.
Also, practice key stages such as siphoning your beer or boiling with your pot beforehand. It’s better to come up against any restrictions or difficulties when working with harmless water rather than having to deal with them when working with your precious wort.
Space on bottling/kegging day
As with my brew day, I do this in the same kitchen space and it is totally doable for bottling and kegging, although the latter is very much less fiddly than working with bottles.
The major problem then comes with actually storing the bottles you have filled up, again kegging will cut down on some of the work you but bottles if stored vertically, can take up even less space than a keg and CO2 tank.
For more information on what types of bottles to choose for bottling, check out my in-depth articles on everything about home brewing bottles right here. If you are more interested in kegging your apartment beer, I’ve also written about the equipment you need for this in another article.
Tip to reduce cleaning later
If you are bottling, it’s likely to get very messy especially when you are using an auto-siphon and a basic tube clamp to rack your beer. Basically you are starting a flow by building up suction in the tube and then trying to shut off the flow by squeezing the tube shut at the other end with a plastic clamp.
I find that even if you are a very experienced brewer, you are going to spill some beer. So, I bought myself a large plastic container, which I can also use for sanitizing lots of bottles at once, and placed that under my carboy and bottling system. That way any drips or spillages that I make go into the plastic container and not all over the floor. You have no idea how sticky wort and beer are, and it’s going to save you a lot of elbow grease if you plan for these accidents in advance.
Particular difficulties for apartment brewing
Apart from the clearest problem to see, which is a lack of working space, there are some other difficulties that come with brewing exclusively in an apartment.
Boiling wort
For homebrewers who have a backyard or some other outside space, boiling up your wort often takes place outside. This is partly because it is cooler to do so but also because the propane burners which they use can heat up their wort more quickly than doing it on a conventional stovetop.

If you are planning to boil your wort on an electric or gas stove, then be prepared to have a much longer brew day than other brewers may have for the same kit or recipe when using a propane burner. You may also find that your stovetop simply isn’t capable of getting a good boil going on larger quantities of liquid. So, I really suggest that you test this one day just using water. If you are worried about wasting so much liquid, then perhaps combine the test with a mass tea party or stew day.
Batch yield size
Very connected to your boiling ability is how much beer you can actually make. If the equipment you are using is limited then you will have to think about reducing your target beer yield for each brew day. The ideal amount for an apartment brewery is probably 1 gallon of beer. However, you could make up to 5 gallons of beer at a time if your stovetop is up to it.
The other thing which will determine your beer yield is how you plan to age or carbonate your beer. An average 1-gallon yield equates to about 10 or 12 12 fl oz bottles of beer. A 5-gallon yield is going to be five times that amount give or take a bottle.
I’ve done a study of the amount of space you need for each bottle, and all the other brewing equipment in this article here where I say each 12 fl oz bottle has a volume of 1.14 ft3 /32,515 cm3.
Kegging can be a good way to store your beer in a tight space if you have an extra fridge or chest freezer which you can put it in. However, to be honest, making a Keezer does require a bit of space, so bottling may be the best option for most beginner apartment brewers.
Working around family or roommates
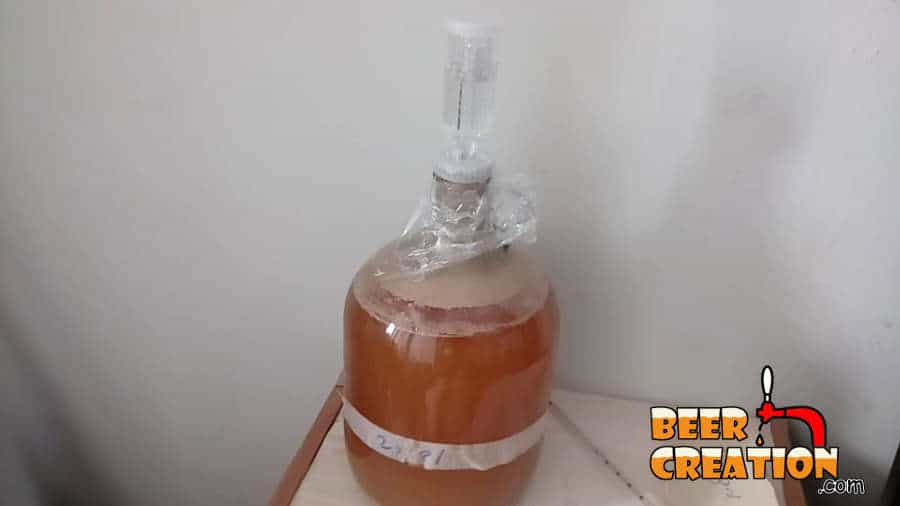
You will need to take over your kitchen and possibly bathroom for several hours on brew day and bottling/kegging day. Not only that, you will need to earmark some space for your fermenter where the yeast will do its job and also space for your bottles or keg.
On brew day, expect a lot of heat and maybe some smells coming out of your wort while you boil it up. if you have to share the space with anyone else, it’s best to get them out of the apartment for a couple of hours to avoid any disputes, or alternatively get them involved despite the tight space. Check out why I say this by reading my 28 reasons to start brewing article.
Cooling your wort in an apartment
Whether you are following an all-grain or an extract-based recipe, you need to cool your wort down to below 170°F/ 76°C before you pitch it with your yeast.
It’s a very critical time on any brew day as this is when your wort is most susceptible to bacteria entering it, which could cause a lot of issues later with taste and aroma.
So, how do you cool your wort down in an apartment? Well, you can do it in exactly the same way as you would in a garage or shed brewery by using a wort chiller. This is a copper looped tube which has a flow of cold water forced through it as it is lowered into your wort. Being copper (or stainless steel) it conducts the heat from the wort through into the cool water flowing in and out of the copper tubing. A very neat solution to a common brewing problem.

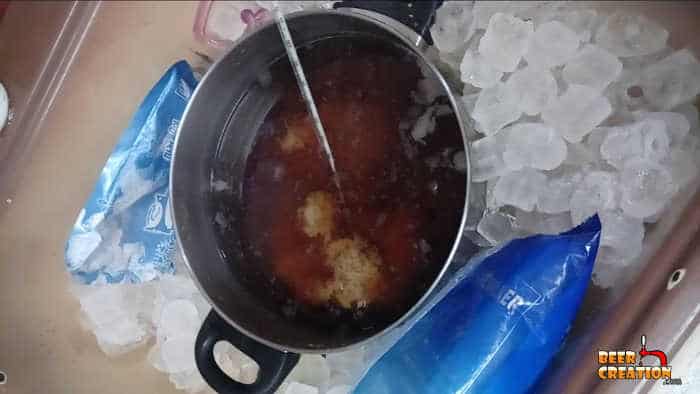
But what if you don’t have an immersion wort chiller handy? How can you cool your wort in your little apartment brewery? Well, I used the good old fashioned ice bath method. If you are brewing about a gallon of beer you can do this in your kitchen sink, otherwise you can use a bath or large container in your shower for larger yields.
It requires a lot of water and ice, but you literally place your boil kettle in the sink or bath and surround it with as much ice as you can find. Although it’s not as quick as using a wort chiller, this is a good method to use if your brew day is taking place in your apartment kitchen.
Equipment needed
Let’s split this section up into All-grain, Extract-based and BIAB just so that you have all the information clearly in one place. Also check out my article on brewing equipment that’s actually worth buying, because some things you just don’t need!
All-grain
- Mash/lautering tun + hot liquor tank
- sparge arm (fly sparging)
- boil kettle
- fermenter
- 12-53 bottles + caps
- beer capper
- (alternatively) Keg + CO2 cylinder
The major difference between all-grain brewing and using an extract-based kit or recipe is that you have to lauter or rinse your grain in order to extract as much fermentable sugar as you can into the wort. This is possible in an apartment, but it just requires some extra equipment and space to do it.
Extract
- boil kettle
- fermenter
- 12-53 bottles + caps
- beer capper
- (alternatively) Keg + CO2 cylinder
I think an extract kit is ideal for apartment brewing as you can basically do everything using the one pot. Unlike with BIAB brewing, you don’t have to fuss about trying to lift the grains out of the pot and allowing it to drip into your pot or even sparing the bagged grain. At any rate, it’s a good place to get started as a brewer.
BIAB
- brewer’s bag
- boil kettle
- fermenter
- 12-53 bottles + caps
- beer capper
- (alternatively) Keg + CO2 cylinder
Brew In A Bag is a brewing method that was designed to cut out some of the work for brewers, so it seems like a perfect method for all-grain brewers in apartments. However, you do need to remove the bag and squeeze it (at the very least) to get as much of the converted sugars into your wort as you can. This can be a tall order when you don’t have a lot of space to play with and probably no easy way to suspend the bag over your brew kettle.
For my recommendations on the best equipment to choose, check out my recommended gear page.