
As a keen brewer and someone very conscious of environmental conservation, the amount of water it takes to ‘chill’ an average size batch of beer is soul-crushing.
My first attempt at using an immersion chiller was terrible. Not only was the wort chiller inadequate in size and length but it also had terrible leaks leading to even more water being wasted.
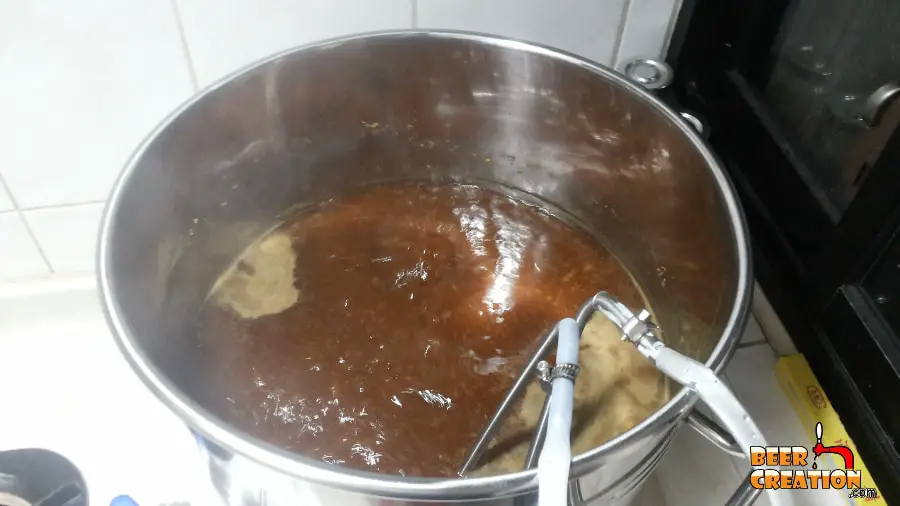
To boot, I didn’t then know that it was only chilling a small section of the wort, leading to even more water literally down the drain.
The main ways to reduce water wastage when cooling wort is through reuse or spent water & reducing overall consumption. When using a wort chiller, increased surface contact & efficiency are key as is cooling down the water source as much as possible. Cooling wort overnight is another viable option.
I’ve researched every scenario I can think of and gone through every way you can save water while still brewing excellent beer. Just to do my little bit for the planet, and beer brewing community, I’ve listed all the results in this article.
Conventional cooling techniques
So, just to make sure we are on the same page, let’s quickly go over the more conventional ways that a brewer may cool their wort and briefly why we even do this.
Ice bath
Most brewers will opt for an ice bath on their very first attempt at making beer, this is largely because they are just working from a starter kit (see my top picks here) and don’t have a wort chiller yet.
New to homebrewing? Please feel free to read my ultimate guide to brewing beer at home and where to start.
Wort chiller
There are three main types of wort chiller and a bunch of different models. They are immersion chillers that are placed directly in the brew kettle as well as counterflow and plate chillers which have both the wort and cold water pumped through them.
Of the two methods, wort chillers use the most water when used in a conventional way

Measuring water usage
Although we are trying to save water here, it’s probably useful to understand just how much water you can be saving by making a few changes to your brew day routine.
Of course, to understand this you need to calculate how much water you actually use. This can be done by monitoring your water meter and taking into account a normal day’s water usage compared to a brew day’s usage.
Alternatively, you can use a bit of math.
So, if you fill up a container, either a 1-gallon carboy or 0.25-gallon jar which you can multiply by 4 later on, this will give you a starting flow rate from your garden hose/ faucet.
If you did the same thing but collected water coming through your wort chiller, you’d instantly know how much water you are using every minute.
On average, an immersion chiller will take 15-25 minutes to cool a 5-gallon batch of wort whereas a counter-flow or plate chiller will take nearer the 5-15 minute mark. Of course, there are so many factors at play here it’s not easy to give a definitive answer to how long it takes in all cases.
So, if your flow rate was, say 3 gallons/minute you could be looking at 60 gallons to cool down only 5 gallons of wort. That’s just crazy!
Saving water: Conventional Wort chillers
So, I want to make it very clear that I’m not on the attack here. You are reading this post, so at the very least you are aware of the issue and you want to do something to combat it. It really doesn’t matter if it’s from a financial point of view or an ecological one.
So, the easiest thing to do is to try and save and reuse as much water as you can rather than trying to totally revolutionize your set up.
Personally, I buy my brewing water from the supermarket and I normally get it in 1.5 gallon plastic bottles (6l). Over time I collected quite a few of these bottles up and they were great for collecting water coming out of the business end of my immersion wort chiller.

Obviously, as you cool down the wort some of the water you can collect will be piping hot and some will be much cooler, so you can even use this water for different tasks around the house.
Remember that the water you are pumping through your wort chiller, for the most part, is perfectly clean. However, I know personally that some wort chillers are a bit oily initially, so I wouldn’t drink this water or use it in cooking.
Ideas for water reuse:
- Cleaning brewing equipment
- doing the washing up
- washing your car
- water the garden
- flushing the toilet
- making ice for an ice bath (not for your drinks)
- drinking water for pets (only after several uses)
- showering (you are a true eco-warrior)
Alternative sources of water
If you are able to then you can use rainwater to both clean your brewing equipment and chill your wort. Although this is, of course, using a precious resource, it’s a lot less wasteful and is essentially only ‘borrowing’ nature’s water before returning it back to your back yard.
Saving more water: Reducing water usage
When it actually comes to reducing how much water you use, there are a few things that come to mind.
Firstly, there is the issue of the temperature of the water you are using. More often than not, and especially in warmer climates, the actual temperature of the main’s water you are using in your wort chiller is going to be higher than the optimal pitching temperature.
So, no matter if you allow 1 or 1 million gallons of water to flow around it, that wort isn’t going to be cooled to a lower temperature than the cooling water itself.
So this means you need to do one of two things.
1) stop using the wort chiller when you reach the water’s starting temperature and then rely on an ice bath.
2) cool the water you are using down to or below your target pitching temperature.
With option 1), if we assume that you are saving water for later use and stop the flow of water when its use is becoming redundant, then this is a good way to stop excessive water wastage.

However, option 2) is far better because it will cut the actual quantity of water you use down by as much as half, if not more. There are two main ways to cool your cooling water right down
Making your water super cold!
As I said, there are two main methods to cool the water you are using in your wort chiller down to or below the temperature you need before you can pitch your yeast
Method A
If you are able to get your hands on two chillers, one of which is a wort chiller (25ft or more is perfect) then you can set up a series system that will help you cool your water right down.
Connect the first immersion chiller to your garden hose or kitchen faucet and then place that wort chiller in a bucket of icy water. Next connect this wort chiller to another wort chiller, either immersion, counterflow or plate. This will help you cool down the water to a fairly low temperature which will cool down your wort more quickly.
However, you still need to think about collecting and reusing that collected water. So, perhaps Method B is better for you.
Method B
An alternative to creating a series system is to create an entirely closed cooling system that can reduce your water usage to the 10s of gallons.
Here you will need a beer cooler full of icy water and a regular aquarium pump to force water around the circuit. I’ve actually written a full article on the best type of pump for the job, which you can check out here.
Basically what happens is icy water is forced through the wort chiller and is then dumped back into the same container as warmer water. Of course, you need to keep topping up the cooler with ice as it melts, but you do actually use a heck of a lot less water overall.
The cooler water can then be used for cleaning, washing or watering afterward. It’s not a perfect system but it’s a lot less wasteful than just turning on the faucet and pouring all that water down the drain.
Bonus: Method C
In order to cool down the wort more quickly and, hopefully, use less ice in the beer cooler, you can use ice to cool down your wort in the brew kettle more directly.
This can be done by sitting the entire brew kettle in a deep ice bath with plenty of coverage below and to the sides of the vessel. You can also calculate your boil-off rate and top up your wort by placing clean ice directly into your wort. I’ve researched this thoroughly and although many brewers never do this, it’s a viable option for saving water.
Best wort chiller to save water
Here it really does come down to size and efficiency. You either need a coil which is longer, to ensure more contact with the wort or a heat exchange will more contact. So, these are the three that I would choose:
Immersion chiller
Northern Brewer Silver Serpent

Check out the latest prices and deals on Amazon.
Counterflow chiller
NY Brew Supply Deluxe

Check out the latest prices and deals on Amazon.
Plate chiller
HFS(R) Homebrew Beer Wort Chiller

Check out the latest prices and deals on Amazon.
Alternatives to wort chillers
Of course, the most obvious way to reduce the amount of water you are using to chill your wort is to stop using any water at all.
As a new homebrewer, you are bombarded with horror stories of infected beer and allowing your wort to sit at a temperature which bacterial could easily start to breed.

However, if you are sensible and are diligent in your cleaning and sanitizing, then you can easily go down the ‘no chill’ avenue. This is when you don’t even bother to reduce the temperature of your wort and just allow it to happen naturally.
Of course, you don’t want to do this while exposing your wort to the outside world, I’m not that crazy, but doing it in a sanitized fermenter which is sealed is totally possible.
In fact, for a long time, before I solved the issue of how to use less water, I opted for cooling my wort overnight for all of my batches and never had any issues with infection or off-flavors.
In fact, I wrote an entire article on cooling wort overnight based on my experiences which you should read if you want to cut out water wastage entirely.
Key temperatures at which bacteria die
I thought this was very interesting and useful as it may help you plan whether or not you want to forgo a wort chiller and at which times your wort is most vulnerable.
Bacteria | Thermal death point | time (m) to kill |
|---|---|---|
Lactobacillus | 136.4-140 °F (58-60 °C) | 10 |
S.Pastorianus | 136.4-140 °F (58-60 °C) | 10 |
Acetobacter | 125.6-129.2 °F (52-54 °C) | 10 |
Lactobacillus Lindneri | 140 °F (60 °C) | 10 |
When cooling, all these common bacterial strains commonly the cause of off-flavors and infections in beer can start to breed.
Compromises of being super-green?
If you do choose to follow me down this path of forgoing the process of chilling your wort at all, you will need to make some sacrifices in the quality of your final beer.
The most dramatic compromise is with the clarity of the finished beer. I have brewed Pilsners to porters using, or not using, the cooling overnight method and this, of course, means I don’t get the benefits of the “cold break”.
This means that my beer is often very cloudy. However, cloudy beer is the least of my worries and I think it’s a perfectly acceptable compromise for the time and water I save by not rapidly cooling the wort.
Of course, there are some fixes to a cloudy beer even if you don’t cool it, and I’ve spoken about them in my article here about fixing cloudy beer.