
It’s one of the most talked-about parts of brewing and it can be the most intimidating step for most new brewers, but chilling your wort is easier than you may think. There are several techniques you can use which will cool that wort down in different ways and at different speeds.
So, how do you cool down wort quickly?
To chill wort you need to facilitate heat exchange either through the use of tools or by natural means. A wort chiller runs cold water in copper tubing to remove heat quickly. Other methods include putting the boil kettle in ice or cold storage. Swift cooling reduces the risk of bacterial infection.
I’ve done a lot of research and tried to explore every possible way that you can safely and quickly cool down your wort so that it’s ready for pitching. Stick around for some of the new techniques as well as the more traditional or bizarre methods of cooling wort.
The importance of chilling your wort
Ok, so what’s all the fuss about, why do you actually have to cool down your wort before going onto the next step?
Well, during the boiling period of your brew day you’ve increased the temperature of your wort in order to break down your hops and to sterilize the liquid.
But that wort is now sitting around 212°F/100°C as its boiling, and that is a very inhospitable environment for the star of the brewing show, your yeast. If you were to introduce yeast cells into the wort directly after you turn off your gas, you’d have a mini massacre on your hands.
So, it’s important to reduce the temperature of your wort down to a more conducive temperature for yeast growth and consumption of the fermentable sugars in that wort. As a rough guide, this is going to be below about 70°F/21°C. So, that’s a big difference in temperature and you are really against the clock if you are leaving your wort exposed to the elements during the cooling phase.
The dangers of cooling too slowly
Although every brewer is a clean freak, there are microscopic enemies all over the place even if you do splash sanitizer round like a maniac. Cooling your wort is one of the most critical periods in brewing as it’s the most exposed your wort is to bacterial infection.
The longer your wort takes to cool the more likely it is that it will become contaminated in some way, especially if you don’t have it covered up and airtight.

As your wort cools down naturally, at certain temperatures any bacteria which is present will start to multiply very quickly if given half a chance. So, this is why you want to cool the wort as quickly as you can, get it safely into your fermenting vessel and pitch your yeast as soon as humanly (and physically) possible.

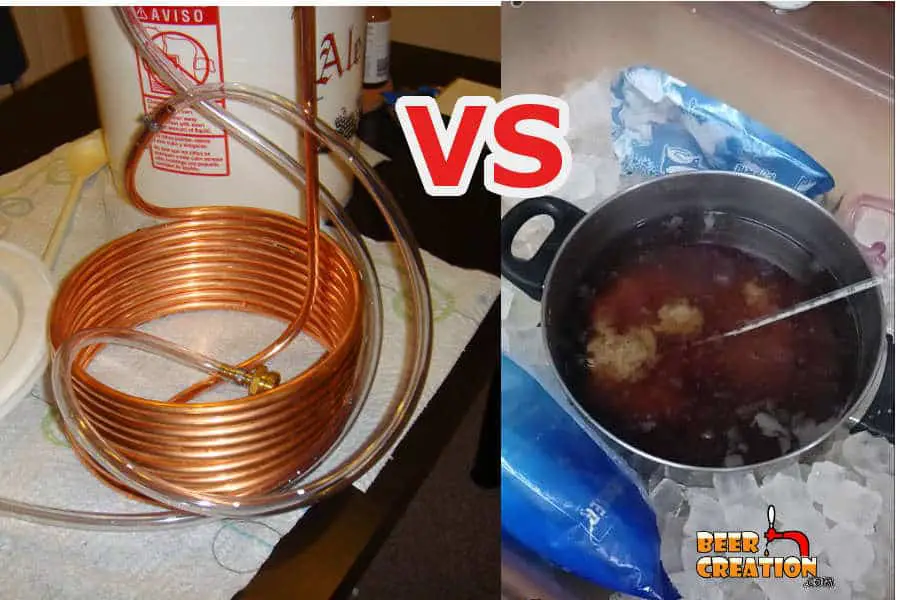
Using dedicated equipment
There are some very popular pieces of kit which many homebrewers use and they are called wort chillers (for obvious reasons). There are different models but they all do the same thing essentially, remove heat very quickly from your wort.
Immersion wort chiller

This is a copper (or stainless steel) tube that has been coiled to fit in a conventional brew kettle with the input and output tubes side by side which have been extended to be at the top of the unit so that the hose doesn’t sit in the liquid. Usually, we place the immersion wort chiller in the boil for the last 15 minutes to really sterilize it (even though you should sanitize it too).
After the boil is finished, you run cold water through the tubing and out the other end. In this way heat from the wort is transferred to the cold water rushing through the pipe and it cools much more quickly. It’s really a simple and fairly cheap piece of kit that can save you hours in the course of your brewing life. The only catch is that you need to be brewing in a place where you have access to a hose. A garage or backyard is ideal and at a pinch, you can also do this in your kitchen fairly easily.
Check out the deals on Amazon for immersion wort chillers.
Counterflow wort chiller
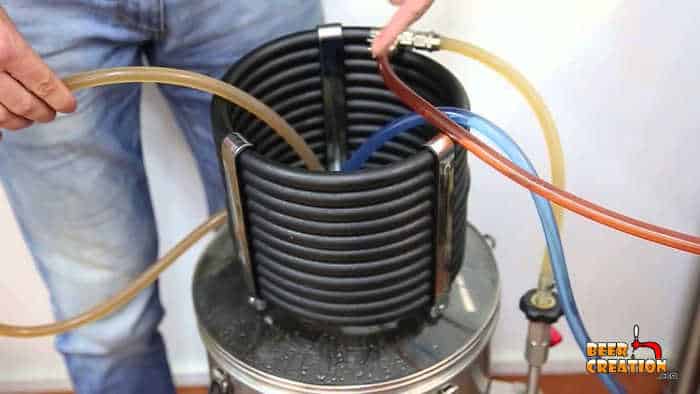
This piece of kit is a lot more complex than its simple immersion cousin. Instead of sitting in the wort directly, a counterflow wort chiller is an external unit that you can place over your boil kettle or even your fermenter or anywhere you want really depending on the length of tubing you use.
The basic idea is that you are going to be pumping your hot wort through one tube and cold water through another in opposite directions, a sort of heat exchange form of chicken.
The wort chiller has two copper tubes (or stainless steel), the inner one is where the wort will be flowing through and the larger tube which surrounds the inner tube is where you pump in your cold water. There is also a valve you can use to control how fast your wort flows through the inner tube.
With this type of wort chiller, you can even transfer the wort directly from the boil kettle into your fermenter if you can get the right heat exchange efficiency.
You can pick up a bargain of a counterflow wort chiller on Amazon these days, this would be my choice.

Plate chiller
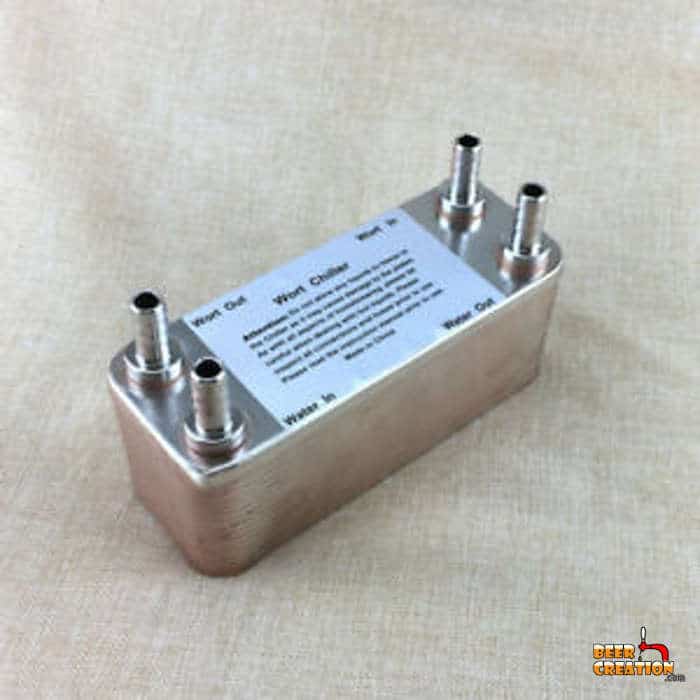
This is perhaps the most complex piece of kit and, from my investigation, the most efficient in cooling down your wort. The plate chiller is a fairly small device for what it can do and works on the same principle as a counterflow wort chiller in the sense that the wort and water are forced through the device.
However, rather than allow the wort and water to come into contact just through the walls of the tubing, a series of heat exchange plates transfer the heat from the wort to the colder water. It happens so efficiently that by the time the wort makes it out of the outlet valve, it’s cooled right down!
Most plate chillers don’t even require an additional pump and work through the power of gravity alone, although you may have to check you have enough water pressure to force cold water through the unit effectively.
Pick up your very own plate wort chiller from Amazon while stocks last, they are that good!
For a more detailed review of several different types of wort chillers, check out my 5000-word article: ‘Best immersion, counterflow & plate wort chillers‘.
Use ice water
If you want to get in quicker results from your wort chillers, you can run ice water through the tubes rather than regular tap water via the garden hose. Although the water will cool a little more through the effect of forcing it through a narrow hose, it won’t reach incredibly cold temperatures.
If you pump water from an ice bucket or another container or even install an additional wort chiller which sits in a bucket of icy water before it flows through the wort, you could rapidly reduce the time it takes to cool your wort to the ideal pitching temperature.
See my recommended gear page for more details on what I suggest for your home brewery.
Using natural methods
It’s more than likely that if you are brewing your first couple of batches of beer that you won’t have a wort chiller handy. No beginner kit that I’ve come across has this piece of kit included, so what are your options if you are in this situation? Well, they didn’t have wort chillers 5,000 years ago when they first invented beer, so there must be another option, right?
Ice bath
This is a tried and tested method and it really does work. All you need to do is to fill a sink, bath or other large enough container with ice and water and place the boil kettle into it.

It’s Ok to covert the pot with a lid and pour ice all over it as at this stage all the DMS which causes off-flavors should have escaped during the boiling phase.
In this way, the wort will cool a little more quickly than by just leaving it in the open air due to the lower temperature of the ice/water around it.
You could speed up the process by pumping out the water and replacing the ice as it melts to simulate the same effect as a wort chiller, but it’s OK to just leave the pot there if you aren’t able to do this.
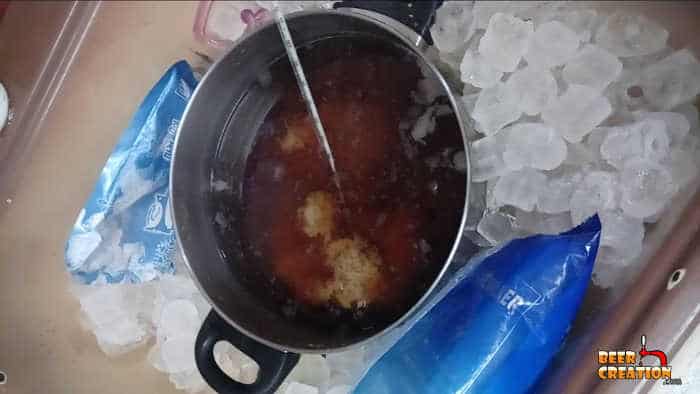
Use Ice packs
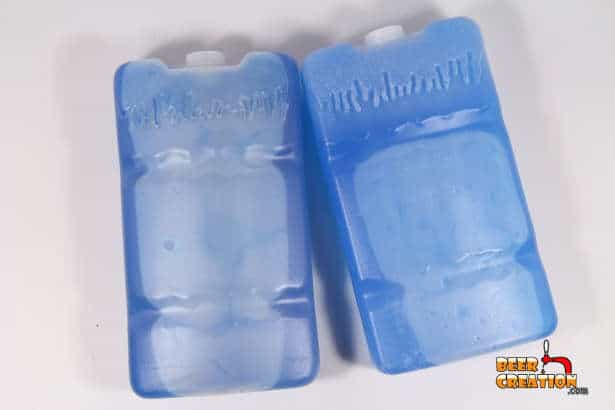
Another alternative or an addition to your ice bath is to use ice packs. Just make sure that they are food-grade material and will not give off any flavor, aroma or chemical if heated.
First sanitize and rinse the ice packs to make sure that they won’t introduce any bacteria as they heat up, then pop them into a brewer’s bag of into a sieve or strainer or some sort and introduce them into the wort. If you have quite a lot of these on hand it can help reduce the temperature of the wort more quickly, though it is a little bit more labor-intensive.
Adding ice INTO the wort?
Instead of using ice packs which we later remove, how about dopping a bunch of ice cubes into the wort directly?
Personally I’ve never done this and my immediate reaction was ‘NO WAY!’. I was thinking along the lines that it would dilute the wort and ruin it. However, the more I thought about it the more I realized that in some circumstances this could be a valid course of action.
I would only ever add ice directly to my wort if A) I’d thoroughly sanitized my ice container before use and only used boiled water to freeze into ice cubes. B) If I’d miscalculated my batch size and had lost more liquid through evaporation than I anticipated.
I was so interested that I researched and wrote an entire article about cooling wort with ice, you can read it here.
If neither of these things was the case, then I’d probably use another method to chill my wort.
Refrigerate
Remember, it’s not so much the time that we are worried about, but the exposure to the elements. So, if you have a fridge or even a freezer with enough space, you can place your boil kettle in there and make sure that it’s covered up.
Honestly, this isn’t the best thing for the environment as your refrigerator is going to have to use a lot more energy to maintain it’s temperature, but if you have no other option it’s something to consider.
After about 40 minutes to an hour, you should have the wort down to the ideal temperature, or very close to what you need to pitch your yeast.
If you chill the wort too much, then just take the pot out of the fridge, rack the wort into your fermenter, and allow it to warm up in the ambient air until you hit your target pitching temperature. Of course, make sure that it’s covered as much as you can to avoid any contamination as far as you are able.
Winter wort
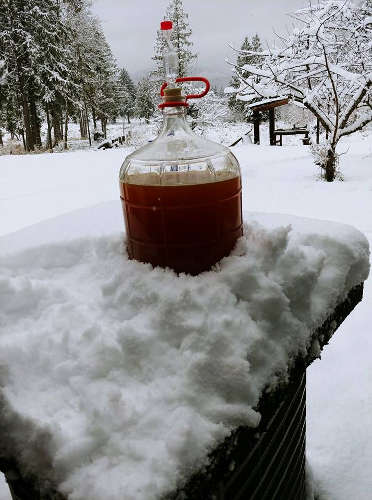
If you are lucky enough to live in a cold climate or it’s winter (writing this in a tropical climate!!) then you can simply put your wort outside until the temperature drops. Make sure that you don’t allow the wort to freeze and that it’s covered up to avoid anything nasty from dropping in. It’s also a good technique for cold crashing beer.
Just leave it overnight
Another completely different approach is to just transfer the hot wort directly into your fermenting vessel and then seal it securely and leave it to cool down naturally.
In this way, you don’t have to worry about any risk of bacteria and air entering the fermenting vessel and you can just give the wort the time it needs to naturally cool.
To facilitate this, you could also leave the fermenter sitting in a bath of cold water. I wouldn’t recommend using too much ice just incase you cool the wort down too much which could lead to some of the fermentable compounds you actually need later dropping out of suspension.
Alternatively, you can wrap the fermenter in a towel soaked in cold water to help cool it down a little faster.
Want to know more, then feel free to check out my more in-depth article about cooling wort overnight.

Choosing the right brew kettle
Another important thing to consider when trying to cool down your wort without any fancy kit is the type of container it is sitting in. All of the worth chillers which I have mentioned above rely on the principle of heat exchange or conductivity. The same is true of the brew kettle you are using.
I’ve written a full article about choosing the right brew kettle, which you can find here.
Most brewing equipment is made of stainless steel because of its durability, but steel is less conductive in terms of heat than aluminum or copper. If you can’t get a copper pot of the size needed, get an aluminum one and failing that settle for a stainless steel vessel.
In extreme cases, you could transfer your wort into smaller aluminum or copper vessels and cool these down with the methods I spoke about before. It’s really a case of what you have to hand and how much work you want to put into it!
How long does it take to cool 5 gallons of wort?
At some point in your brewing career, you are going to be faced with a brew day dilemma. Maybe you’ve decided to get a brew in before your wife went into labor and the damn kid has got a jump on you or you thought it was a bank holiday but it turned out you were using the calendar from last year instead of this year. Or, something really good is on the TV and you can’t record it!
Whatever it is, you want to know how long have I got to wait to cool this beer, rack it into your fermenter and pitch it before you can rush out the door.
There are many factors that determine the cooling rate of liquids including the ambient temperature and the distance separating it from the liquid. Well, you could use Newton’s law on cooling to get a rough idea: T(t) = Ts + (T0 – Ts ) e(-kt) but this isn’t widely excepted as the best way to measure it.
But as a general rule, using any wort chiller is going to take-10 -30 minutes to chill the wort to the correct pitching temperature whereas natural cooling methods may take anywhere from 60 minutes (ice bath) to a full day (cooling in a fermenter).
NOTE: The wort, if cooled naturally, cannot drop below the ambient temperature surrounding it. For example, if the outside temperature is 86°F/30°C then the wort will cool until it reaches this temperature and no lower.
Summary
Chilling your wort is an important part of the brew day, but it doesn’t have to cost you a lot of money to do it. Although time-consuming, you can use more natural and traditional ways to chill the wort adequately. However, I would strongly recommend that as soon as you are able that you invest in a basic wort chiller as it’s going to save you a lot of labor, and most importantly, a whole lot of time!