
Homebrewing is a hobby that has a lot of gadgets, equipment, and interesting paraphernalia. If you were to purchase everything available on the market, you’d have to have very deep pockets.
This being said, I think most homebrewers would agree that there are certain pieces of brewing equipment that are just essential to have, even for a brand new homebrewer.
I would argue that a wort chiller is one of them.
Using a wort chiller saves the homebrewer time and helps mitigate many of the temperature-related risks wort can be exposed to and can ruin entire batches of beer. Though not essential to brewing a beer, wort chillers are very useful pieces of equipment and are therefore worth this small investment.
Although this is a fairly straight forward answer, there is actually a little bit more you need to know about wort chillers before you make your own decision.
I think that by the time you get to the end of this article though, you’ll agree with me on this. Wort chillers are a really useful tool for any homebrewer.
What does a wort chiller actually do?
As the name suggests, a wort chiller helps to rapidly reduce the temperature of the wort, the term given to the sugary unfermented beer solution, so that it can be quickly pitched with yeast and then fermented. Without a chiller this process can take significantly longer and increases certain risks.
As you probably know if you have been researching beer brewing for even a short amount of time, temperature is vital.
As a homebrewer, you need to get perfect temperatures during the mashing of all-grain recipes, the boiling of the wort to extract Alpha acids from hops, and during fermentation.
You also need to control the temperature of your wort before you add the most important ingredient, yeast. This point in the brewing process is often the most ‘dangerous’.

As soon as you reduce the temperature of the wort below 143°F (62°C) you are at risk of bacterial infection from acetobacter strains of bacteria which could very likely lead to off-flavors in your beer.
As cooling wort is left exposed to the air it is also left exposed to bacteria present in that air. If left to cool naturally, this process could take a couple of hours (based on Newton’s law of cooling) depending on several factors.
A wort chiller reduces the risk of bacterial infections as it rapidly reduces the amount of time that wort takes to cool.
Relatively speaking, the sooner you introduce yeast into your wort the sooner you have a ‘friendly’ microorganism that is helping you combat the nastier bacteria present in your batch.
How to use a wort chiller
Although there are three different designs (immersion, counterflow, and plate chillers) which are popular amount homebrewers, all wort chillers work based on the same princible.
Using cooler liquid to extract heat from your wort and rapidly cool it.
Essentially for all wort chillers what you have to do is to ‘pump’ cold water through metallic piping (or thin plates in some cases) and allow the hotter escaping water to flow into a sink or collection vessel.
Usually, it’s best practice to have your wort chiller set up and ready to go as soon as you reach flame out. This will help you to reduce the risk of bacterial infection and also to reduce the length of your brew day.
Top tips
- With immersion chillers, make sure that you ‘sanitize’ the chiller by placing it in your brew kettle 15 minutes before flameout.
- Test all your connections BEFORE using the wort chiller to avoid leaks into your brew kettle.
- calculate your faucet flowrate and either firmly fix the outlet tube to your sink, or buy a large enough collection bucket that helps avoid spillages and water wastage.
How quickly does a wort chiller work?
An immersion wort chiller will cool wort in less than 30 minutes, whereas counter-flow and plate chillers can achieve it in half that time. The actual time it takes to cool wort will depend on the temperature of the cooling water, the type, size, and efficiency of the wort chiller being used. In all cases, it’s much faster than the natural cooling process.
I have cooled wort in three main ways during my time as a homebrewer. I have used the ice bath method, I have simply racked the wort into my fermenter and left it cooling overnight and I have used my good old immersion wort chiller.

By far the quickest and, in my experience, the least dangerous for the ‘health’ of my final beer is using a wort chiller.
However, I have to say that only by using ice-cold water in my wort chiller can I get anywhere near the correct pitching temperature needed in the summer months.
So, just be aware that your wort chiller, as good as it is as a tool, is limited by the laws of physics too.
New to homebrewing? Please feel free to read my ultimate guide to brewing beer at home and where to start.
Which type of wort chiller to get
As I mentioned earlier in this article, there are three main types of wort chillers on the market each with its own benefits.
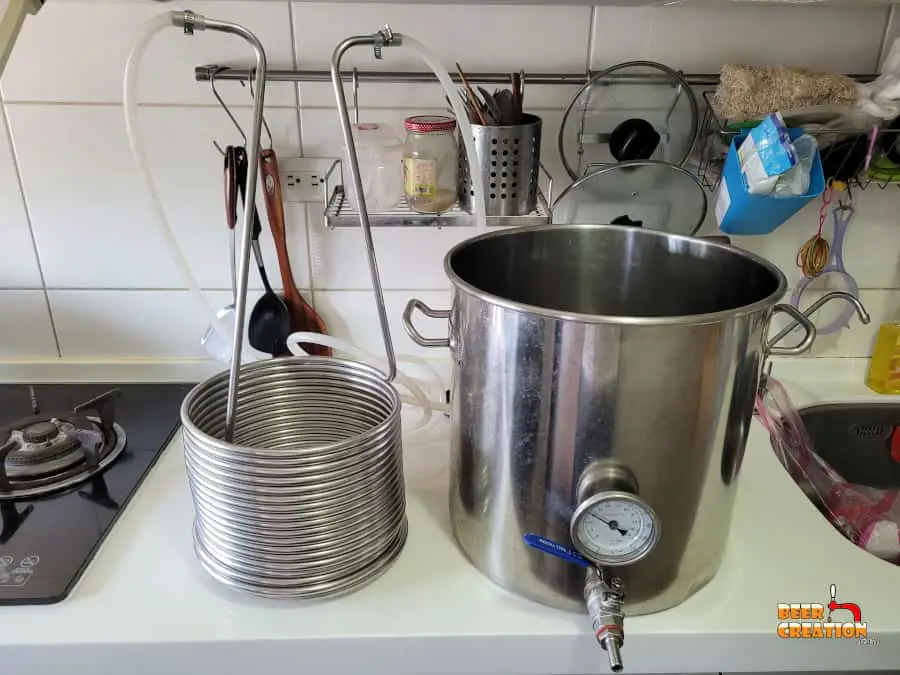
Immersion chiller
Northern Brewer Silver Serpent

Immersion wort chillers work by placing the entire unit of the tubing into your boil kettle (do this about 15 minutes before flameout) and then allowing cold water to flow through it.
If you can set up a cooling system with two immersion chillers in a series, one placed in a cooler of ice-cold water, then you can get a very quick cooling effect which could only take minutes to work.
Honestly, I would say that for almost every homebrewer an immersion wort chiller is the right choice. They are fairly easy to use, effective, don’t require additional kit, and are so easy to clean.
I would also recommend the Northern Brewer Silver serpent if you can get one because its design means that leaks and spillages into your wort are almost impossible. So, you check out the latest prices and deals on Amazon yourself.

Counterflow chiller
NY Brew Supply Deluxe

Counter-flow wort chillers are similar to immersion chillers in principle but are designed in a very different way.
They are used externally, so you don’t need to put them in your wort and they also require the use of a pump (link to my choice on Amazon).
As the name suggests, this wort chiller works by allowing two steams of liquid to flow against each other.
In one tube, you’ll pump your hot wort and in another larger tube, you’ll pump your cooler water, but against the flow of the wort. As the two lengths of tubing contact each other inside the wort chiller, heat is exchanged and extracted by the water.
These wort chillers are really effective but they are best for someone who wants to invest more money on the pumps needed and perhaps someone who is working with an all-in-one home brewing system.
For your first counterflow wort chiller, this would be my choice. Check out the latest prices and deals on Amazon.
Plate chiller
HFS(R) Homebrew Beer Wort Chiller

Plate chillers work in much the same way as a wort chiller but instead of bulky tubes, they have think plates that allow water or wort to flow through them.
Counterflow and plate chillers generally cool wort down more quickly, but not really much more quickly than immersion chillers in relative terms. Of course, it does depend on your mains water temperature.
Although perhaps less expensive than a counterflow chiller, plate chillers are harder to clean. However, of all the ones on the market, this is the best deal and it’s going to reduce your chill down to a matter of minutes.
Check out the latest prices and deals on Amazon.
Alternatives to wort chillers
If you don’t want a wort chiller or can’t get your hands on one for your next brew day, then you are only really left with more natural means of cooling.
I’ve mentioned them breiftly above, but let’s talk about them a little more here.
Cooling overnight
This is actually quite common and would have been the only means of cooling wort before around the 19th century.
As soon as your boil is over, you simply rack the wort directly into your fermenter and leave it to cool naturally. This can actually be pretty effective during the winter when the ambient temperature is much lower.
However, there are a few things you should avoid. Try not to use plastic fermenters when doing this as you could run the risk of chemicals leaching into your wort.
Personally, I’m not sure I’d even trust ‘food grade’ plastics as we are talking about boiling temperatures here.
Another thing to consider is when you are using glass carboys, make sure that they are heat resistant. A good way is to test them with ordinary boiling water as this is a lot easier to clean up than hot sticky wort.
I’d also recommend that you don’t stick a fermenter full of boiling wort into a fridge or freezer, it’s likely to overwork the compressor and could hit you right in the electric bill!

Ice bath
Using ice to cool wort is a tried and tested method and does really work. However, it takes a lot longer than using a wort chiller.
The key thing here is to get as much contact between the brew kettle and the ice and also, if possible, to circulate the ice to allow the heat to escape more.
Often, using an ice bath in addition to using a wort chiller can help you drop to that magic pitching temperature even faster.
Other essential brewing equipment
So, I definitely think that a wort chiller is worth the investment as it really helps you produce better beer.
Here are some other things which I think every homebrewer needs:
hydrometer

If you want to get more accurate with your brewing and to know little things like how much alcohol is in your beer, you need one of these (link to Amazon).
Good quality fermenter

In all honesty, you can ferment beer in almost any vessel with a lid, but having a specially designed brewing fermenter is key. You’ll much more likely to brew quality beer and avoid more of the risks associated with brewing. (link to Amazon).
How to brew – J. Palmer

Although the concept of brewing beer isn’t very complex, the actual process can be. Having a good guide to brewing the perfect beer is essential and this is by far one of the best home brewing books out there. (link to Amazon).